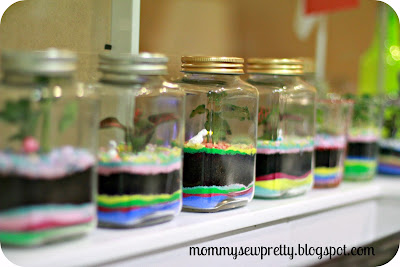
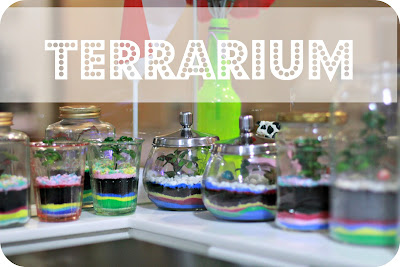
Sorry for the delays in posting the tutorial on Terrarium. I was busy sewing lately..Here's the step by step guide on how to make a mini terrarium at home. Was trying to have some photo but it's very messy with soil and all, so sorry folks, you gotta use your imagination here!
Supplies to get ready
1) small potted plants that are suitable for growing with little sunlight ($3-$4 for one pot of 4 stalks)
2) moist soil -can ask nursery for the suitable one for terrarium ($3 for a big pack)
3) little charcoal (break them into small pieces)
4) pretty bottles ($2 each from Daiso)
5) coloured pebbles ($2 a bottle at Daiso)
6) coloured sands (got mine from a shop at City Square Mall at 4 for $10) - optional
7) small decoration pieces (4 for $2) - optional #
# My friend recently went Bangkok and got these for only $0.10 a piece!
Instruction
1) Sand -You can skip this steps but I feel that the coloured sands make it more special.
- Pour your choice of coloured sands into the bottle. Go slow to let the sand just flow along the sides of the bottle. I use a slender spoon with a long handle to help me put in the sand.
- Lay a few layers if you like but try not to make it higher than 1/5 of the bottle.
- To save on the sand used, you can try to fill up the sands around the circumference of the bottle and let the centre but hollow.
2) Small Pebbles
- drop some pebbles into the middle of the glass where you have earlier left it hollow from the coloured sands.
- The pebbles should be a thin layer to help with the drainage of the water in the bottle.
3) Charcoal
- Add a little crushed charcoals on top of the pebbles. The charcoal is required only if you intend to cover the bottle. If you are making an open terrarium, can skip this step. The charcoal basically remove the moldy smell in the bottle.
4) Moist soil
- Covered all up with the soil. Pack the soil so that it is compact with no air inbetween. The soil and the coloured sands/pebbles should come up to 1/3 of the bottle.
- I use this coffee stirrer that has its ends bent to help me pack the soil. My friend use lighter to heat the area to make it bend. So clever of her!
5) Insert the plant
- Depending how big your bottle, you can put 1, 2 or more plants into the bottle. Make sure that you don't injure the roots when you transfer the plant from the pot to your bottle.
- Use a disposable chopstick to dig a hole in the middle of the soil big enough for you to insert the roots of the plant.
- If you have 2 plants, put them together and insert together. Press the soil over the roots using the stirrer.
6) Coloured sands/pebbles
- Now the fun part, cover the soil with the coloured sands. You can just put 1 to 2 thin layers.
- Covered the top with coloured pebbles. I use 3 packs of coloured pebbles in one mix to create this pretty combi. Just a thin layer will do.
- Put in your decoration and you are done.
7) Lastly, just put a table spoon of water into it and cover the bottle. That's it. You are all done.
Some sources to get your supplies
- Most nursery carry the moist soil and plants. Your plants need to be small and young shoots in order for it to look pretty in the bottle. I got mine from a nursery in Ang Mo Kio. But my friends also found them at Tampines and even Ikea. It's about $3 to $4.50 per bottle. Far East at Thomson is more expensive at $5.80 per pot.
- Coloured sands should be available in craft shops. I got mine from a little shop at City Square Mall at 4 packs for $10. You can choose from a variety of colours. The sands are very fine. You can also get them from Daiso but they are less fine.
- Coloured pebbles can also be purchase at nursery. But I got the most supplies from Daiso. It's only $2 per pack and there are so many colours and sizes options.
- Bottle. So many places. I got mine from Daiso at $2, Ikea and those I got at home. If you intend to give a gift, the Daiso's bottle with cap looks very presentable. But not all Daiso carry them so it will be good to check first. I saw them at illuma, Bukit Panjang and Rivervale Mall.
So, now go and buy your supplies and make it. It is very addictive and so easy that my 7 year old made 7 in not time.


