Tuesday, March 11, 2014

Bags & Pouches - Part 3


Without further ado, this is a sling bag for my 4 year old.


The bag is cut using the bottom of the border print for Nico Nico Land.  Pattern is also from the same magazine Cucito 2012 Winter/Early Spring issue.  Don't you just love this magazine.  It is packed with lots of Back to School projects and lots of bags/pouches/apron ideas.  The sling bag is no. 52 and no. 55 in the picture below.


The original bag uses a quilted cotton as the outer fabric.  I did the reverse. My lining is the pre-quilted cotton so it work out well.  The quilted cotton really gives the bag some structure but not too stiff.  I used it for the Shoe bag earlier.

Instruction is also given using diagrams but without photographs. I think it is still quite clear.  Here you can see the top of the bag is closed with velcro. I cut the fabric so that the top is framed by a border of flowers.


Inside of the bag.  See the quilted cotton? Give it a nice shape and padding. It looks like a bucket if you open up wide.


Here's the side view.  See the strap. Guess where I got them? haha... You are right if you say Daiso.  Both the D Ring, slider (at the bottom) and the strap are from Daiso.


The slides and the D Ring. A set cost $2 so you can make 2 bags with 1 set! Real deal.  Both the pink and red ones have small white polka dots on them. Super cute. I think they also got Yellow and Baby Blue [City Square Mall branch].


Here's the action shot of my girl with her bag. You can see the slider on the bag, making it adjustable and she can use it when she grow taller.


Ahh...when did she grow up so fast! It was just yesterday that she was a toddler learning to walk.  sob..My baby has grown up.

She loves her new bag and the height and depth is just nice to fit 3 A4 size colouring books and 2 big colour pencil cases plus a water bottle. Very roomy.


I love it that the strap is not too stiff. It is quite soft and the soft pink colour matches the bag perfectly.  A happy kid really makes my day.


Next post, I will conclude with a Messenger Bag for my 9 year old.  Stay tune!


Monday, March 10, 2014

Bags & Pouches - Part 2


Welcome back for part 2 of the 4-bags-with-1 yard-fabric post!

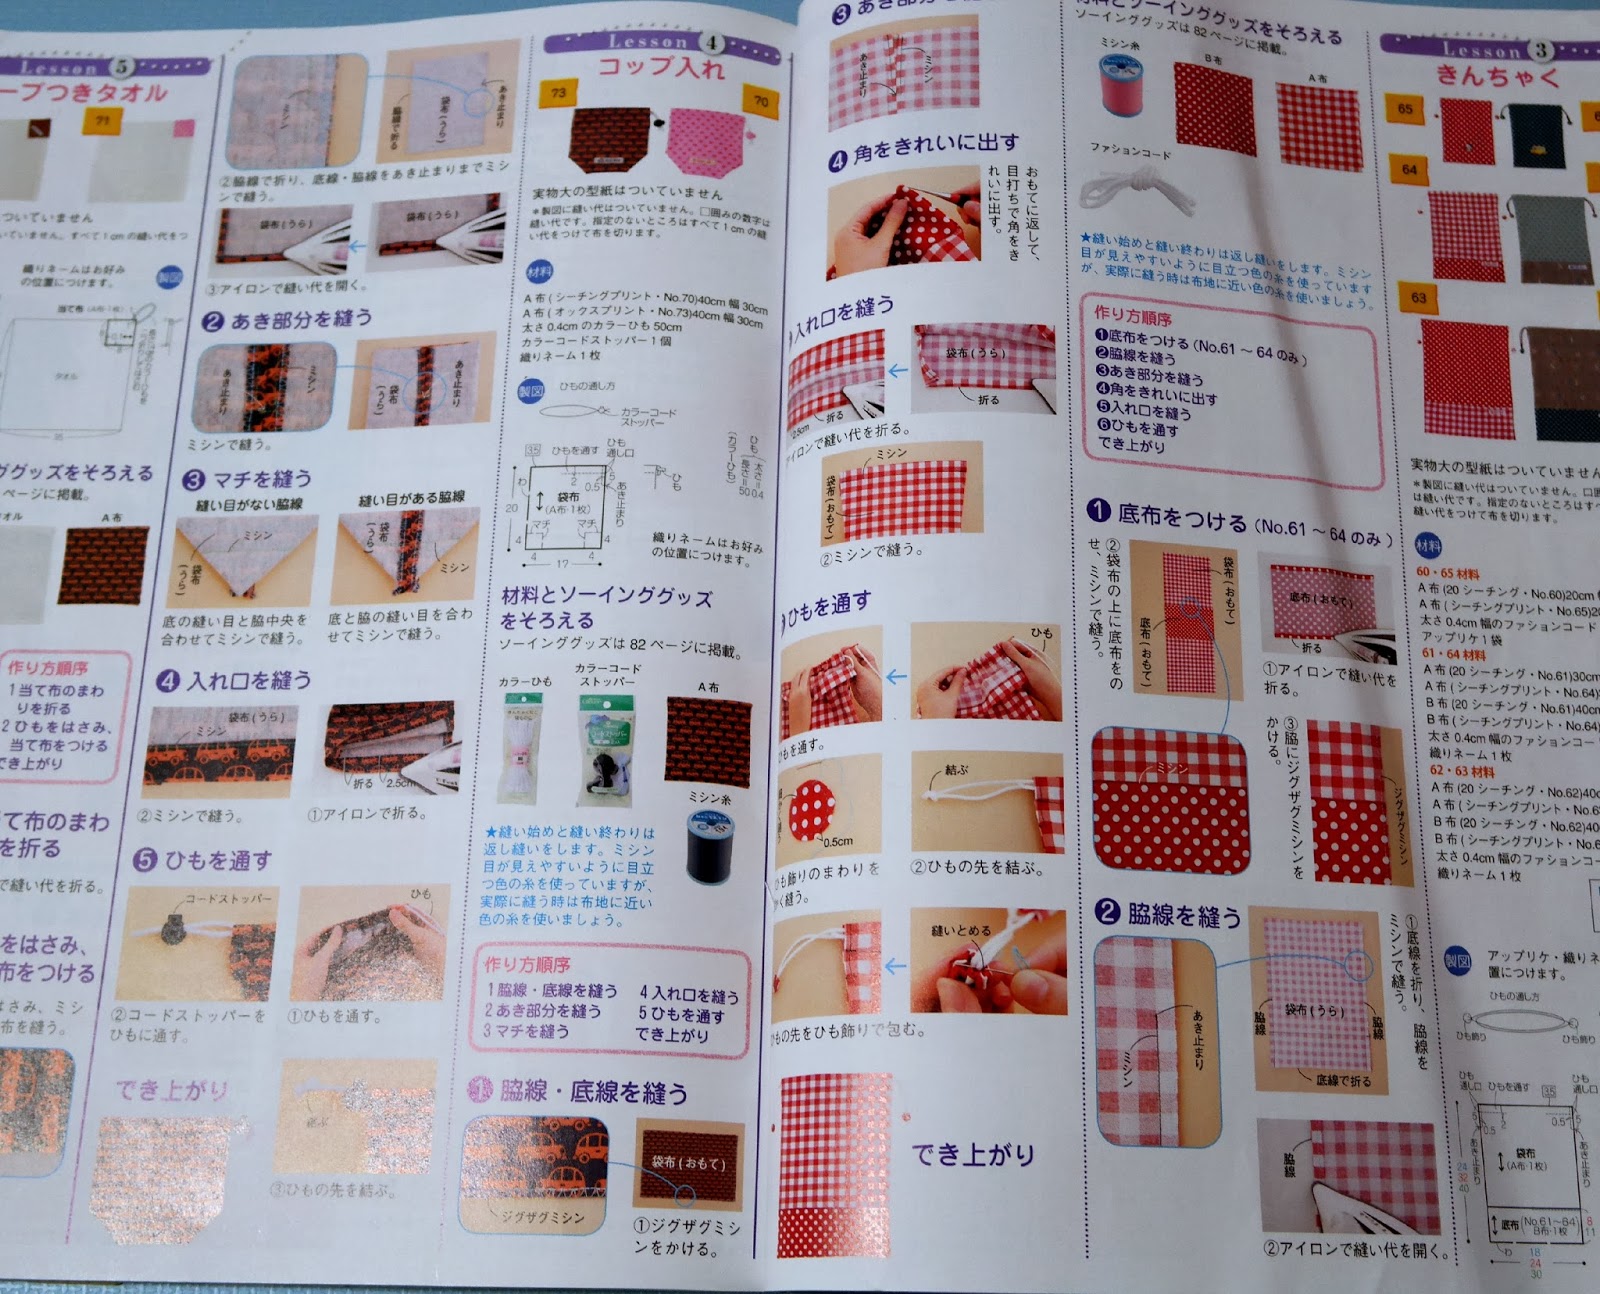
I also made a Cup Bag for the same little girl in Japan.  Cup Bag? What's that? I was surprised when I read the name on the magazine but it seems like in Japan, there is different bags/pouches for different items like shoe, cup, bento, lesson bag etc.


Anyway, I use the pattern from the same magazine.


The instruction is also a photo step by step so it was really easy.  Especially this one don't need a lining.


For this bag or pouch, I use the middle portion of the Nico Nico Land fabric which has lots of cute cakes, macron print all over the baby pink background.


Did you notice my cute pink stopper and beads? I got these as a set [2 stoppers and 4 beads] from Daiso for $2! Yes, you have to believe it. Daiso does carry some of these cute item that is really affordable and add a cute factor to your project don't you think?


Here's how it looks open up.  My Precious Moment ballerina figurine is modelling for me.


Side view.


That complete the set for my little friend.


So, come back again for Part 3! I know, I'm a tease : P

Saturday, March 8, 2014

Bags & Pouches - Part 1


In my last trip to Japan, I bought some Japanese fabric. The bags above are all made from 1 yard of  Nico Nico Land fabric designed by Koko Seki under Lecien.

I'm very pleased with myself to squeezed out 4 items with just 1 yard! The print is border printed on both sides of the panel so if you lay your pattern differently, you will get different design and look!

First up, is a Shoe Bag that I make for my best friend's girl in Japan.  This is the type of bag that the elementary kids use to keep their shoes and bring to shoe. I use the bottom part of the print so that the pink flower will become the base and the cartoon are at the top.


Pattern is from this book.


There is a photo step by step to guide you on sewing such bag.


Instead of the fabric loop that the instruction called for, I use this loop(?) (not sure what you call this item) D Ring.


So you string one end of the strap through the loop D Ring and pull through.  The lining for the bag is a quilted cotton that I got from Spotlight. This one is really useful and save me the time to quilt.  I didn't interface the fabric because the thick fabric plus the quilted lining help to hold the bag nicely.


The loop D Ring and the strap is a set that I got for $2 from Daiso. It comes in bright pink and yellow. I think the colour fits the bag nicely.


I'll share the next pouch in my next post.