Sunday, February 5, 2012

3/4 Pants - A tutorial


My elder girl had recently learnt to ride her new 2 wheels bike and I realized that she didn't had a lot of loose pants that will not restrict her movement on the bike. So I thought I'll just sew her some to supplement her wardrobe.  

This 3/4 pants is really easy to make and all in all, it took me just 2 hours and I didn't use much fabric. Just some left over fabric that I had at home.  

Measurement
To make this, find a pants that fits your child and trace the front and back.  You need 2 pieces of the front and 2 pieces of the back. Note that the front waist length will be slightly shorter than the back piece. The length of the pants will fall just at the knee length so just take the measurement from your kids and you are good to go.  Remember to add seam allowance of 3.8" all around except the hem, I use 2".

2 pieces of front (left) and 2 pieces of back (right)
Instruction
1. Place one piece of front and one piece of the back piece, right side facing, and sew the side seams.  Serge or zig zag the side seams. Do the same for the other pieces of front and back.


2. Press seams towards the back of the pants and top stitch along the side seams using the sewing foot as a guide. Do the same for the other piece.


3. Align and pin the inseams of one pants leg right side together and sew. Serge or zig zag the inseams. Do the same for the other leg piece.


4. Turn one of the leg piece right side out and keep the other piece wrong side out.  

wrong side out (left) and right side out (right)

5. Insert the 'right side out' leg into the other pant leg so that the right sides of the pants face each other inside.  Pin the crotch area.  See photo for illustration.


Sew and serge or zig zag the seams.

6. Turn the pants right side out. Sew 2 rows of stitch along the crotch area using the sewing foot as a guide. Go slow so that you don't accidentally sew the other side of the pants. This is for decorative purpose so you can skip this if you want.


7. To prepare for the waistband and hem, I serge the waist area and hem first.


8. Fold in 0.5" of the hem and press. Then fold in another 1.5" and press. Sew 2 rows of stitch around the hem. Make sure that both pants leg are of the same length else it will look very obvious.


9. For the waistband, I've this beautiful elastic band that I bought from the Textile Centre but have not found the use for it. The color simply match the pants and added the nice color to it. The method is the same as how I sew the circle skirt. 


10. Sew the short ends of the elastic band right side together so that it become a loop.  Then attach the band to the waist area of the pants. Pin the front centre, back centre, 2 sides of the pants to the elastic band. Then, pull as you sew so that it will gather nicely around the waist.


Enjoy the pants!


Saturday, January 28, 2012

Simple Ballet Skirt- A tutorial


My oldest has been taking ballet lessons for the past 2 years and recently, one of her chiffon skirt came apart.

I decided to make her one since I've some left over chiffon from her last skirt project. The whole concept plus cutting and sewing takes me less than 1 hour!  Want to try? For affordable chiffon, pick them up at Jalan Sultan at $4 per yard.

Material
Less than 1 yard of light pink chiffon of width 44"
Braided elastic band

Instruction
1. Fold the chiffon so that the 44" side is folded up twice for ease of cutting.

I've used roller cutter and cutting board for better control.  The length to cut depends on how long you want the skirt to be. I went along with 13" including 2" for the waistband later on.


2. Open up the chiffon and align 2 short edges (13") together and cut a curve using the curve ruler as a guide. I cut mine to be 8" from the edge but you can adjust that to your liking.


3. I use the narrow hem option on my serge to serge the hem starting from the curve line.  As I don't really have a lot of thread in the same shade, I only replace the upper and lower thread as they will be more visible. See below on my setting.  Remember to remove the extension hook.  Read your manuals for details.


Here's how the narrow hem looks like. So neat.

If you have no serger, you can try using the zigzag stitch on your sewing machine with the smaller stitch width. Try on scrap first before you sew the chiffon!


4. Overlap the front curve edges by about 6" and pin.


Sew a baste stitch to secure.

5.  Cut your elastic band to the desired size and overlap the edge by 1" and sew together.


6. Sew a gathering stitch along the waistband using the longest stitch and widest tension on your sewing machine. Adjust the gathers so that the size will fit your waistband.


7. Pin the chiffon to the elastic band, align raw edge of chiffon to the elastic band. Adjust the gathers.


8. Bring your needle down to middle of the elastic band, pull your chiffon taut and start sewing slowly.  Adjust the gathers as you go and pulling the elastic to fit the chiffon.  Your elastic band should be laid nicely flat below the chiffon. Take out the pins as you sew and remember to keep the needle down before you adjust the elastic band.


9. Then, fold the elastic band over to the wrong side and pin. Adjust the gathers.  Your raw edge should now be hidden inside the skirt.


 Sew along the bottom edge of the elastic band using a zig zag stitch.


Done~!

Wednesday, January 25, 2012

Colour Block Skirt - A tutorial


Here's the simple tutorial if you would like to sew a simple colour block flare skirt.

Material
Main color block - 1 metre of 45" width
Hem color block - 1/4" metre of 45" width
5" zipper
Stiff interfacing for the waistband
Some fabric covered buttons or hock/snaps

Measurements
I've given the measurement accordingly to our size but you can adjust accordingly. I'm using the full width of the fabric so you only need to cut the length that you want! Easy.

The skirt will gathered a lot and make it very full. If you like it less full, you can adjust the width accordingly. Seam allowance (SA) is 3/8".  Please read through the whole instruction before you start just incase you missed the steps!

1 pc A = [Waistband width + SA] X (Waist + 2")
2 pc B = [Length of main skirt + SA] X 45" [for my 2 year old, I've cut the width to 33"]
2 pc C = [Length of hem + SA] X 45"

Note:
You need 1 pc of A and 2 pcs of B and C
A and C will be fold over lengthwise 

Blue & Yellow [my girl is a tall and skinny 7 year old]
A = 4.75" X 24 [interfacing = 2 X 23.25"]
B = 11.75" X 45"
C = 6.75" X 45"

Brown [I'm 160m tall with 28" waist]
A = 5.75" X 30" [interfacing = 3"X 29.25"]
B = 16.75" X 45"
C = 8.75" X 45"

Orange [chubby tall 2 year old]
A = 3.75" X 22" [interfacing = 1.5" X 21.25"]
B = 9.75" X 33"
C = 4.75" X 33"

Instruction
1. Cut 1pc of A, 2 pc of B and 2 pc of C. Serge all the raw edges.
2. Fold A into half lengthwise with Wrong side facing and press to make the fold line. Fold in 3/8" on both ends to the wrong side and press.  
3. Iron the interfacing piece to one side on the inside of the folded waistband A, align to the folded edge. Your interfacing will be nicely encase within the folded edge. Set aside.


4. Align the side seams of the 2 pc of B together, right side facing.

 and sew with 3/8" seam allowance on one side. 
Press seams open. Do the same for 2 pc of C.

5. Slip B under C and align the long edge, Right Side Facing.  Pin B to C taking care to align the side seams that you have just sewn.

Sew with 3/8 SA to attach the hem color block to the main skirt.  Press seams towards the main skirt B and top stitch on the edge of B to keep seams down.


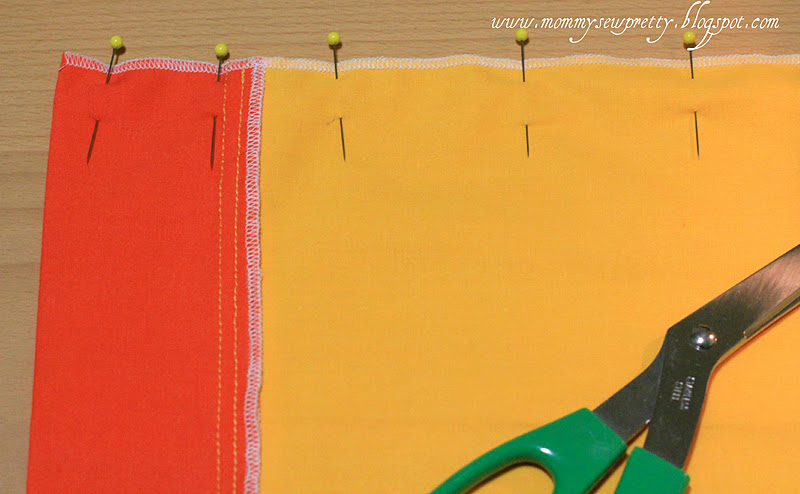
6. Align the other short edge of the skirt, Right Side facing and pin. Take care to align the hem color block so that they are inline.

Sew with 1" SA and press seams open for inserting of the zipper.

Centre Zipper Sewing
# If possible, use an invisible zipper for better results. I've used what I've on hand as I'm pressed for time. So I'm sharing how to insert a normal centre lapped zipper along the side seams.

7. Lay your zipper, Pull Tab face down along the seams that you've just sewn. The middle of the zipper should be in the center of the seam. Pin.

8. Using your zipper foot, start sewing from the left side, up to the bottom of the zipper (just before the end of the metal stopper) and then down to the right side towards the zipper tab.

Take note that you will need to pull the zipper tab up or down when you sew close to them. Go slower and you may need to adjust the pull tab as you sew. Just remember to keep your needle down on the skirt before you lift up the presser foot and adjust the tab.


Stop sewing just before the metal stopping and
sew over a few times at the end to secure before moving up.
this is how the zipper look like from the front. Neat!
9. Use your seam ripper and cut open the seams along the zipper teeth. Be careful not to cut beyond the stop line.

Try pulling your zipper tab up and down to check alignment.

10.  To fit the skirt to the waistband, you need to sew gathering stitch along the waist of the skirt.  Using the longest stitch width on your sewing machine and the longest tension, sew along the top of the skirt piece.

Then, pull the thread to gather the skirt more so you can fit them nicely over your waistband.

11. Once your skirt is ready, pin them to the waistband, right side facing, leaving about 1" free on one side to make the button holes later.

Like my chiffon skirt, I didn't want to leave pin marks on the waistband and 
the interfacing is quite stiff, so I've used paper clips. 
It really helped to stablise the thick gathers when I sew.

12. Using a slightly longer stitch width (I use 3), Sew the waistband to the skirt.

13. Flip the waistband upright so that Right side face out and topstitch along the edge of the waistband.

Notice the nice 1" waistband that is not sewn the skirt? This is for the button holes.
14. Sew the button holes on the flap or if you like, snap or hock or velcro, whatever that works for you and you are done!


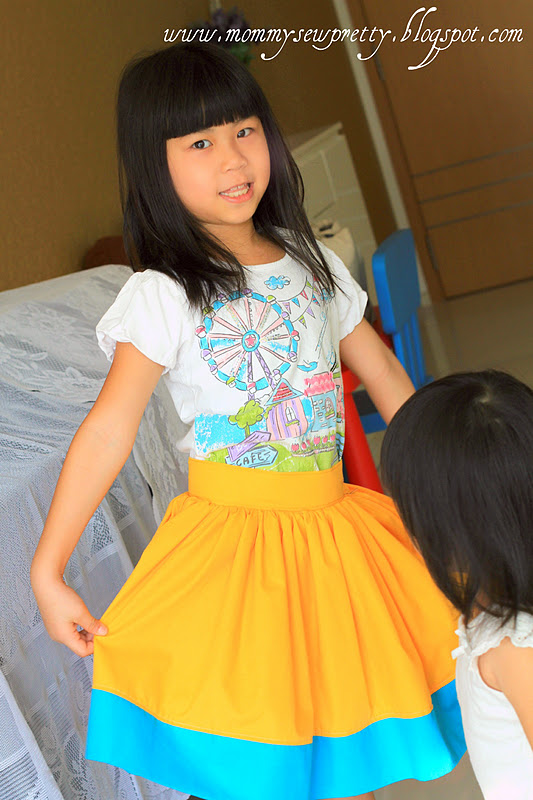
Time to show off your new skirts!


This one makes me laugh!

Now, isn't she the cutest!