Monday, May 7, 2012

Skirt Tankini Tutorial - Pattern (1)


This is going to be a long post so I'm breaking it into 3 parts -
1) Pattern
2) Cutting
3) Sewing

Before I start, I would like to point you to the some of the many resources that I've got on blogland which had helped me greatly in sewing this up.

Creative chicks swimsuit tips which I find my useful tips on sewing the elastic and different kinds of swimsuit design that we can use.

Zaaberry's Swimsuit Tutorial is very informative as she goes step by step on how to sew a one-piece swimsuit for her girl. She included a pattern too.

Dana's tutorial on Swim wear sew along has some helpful tips and I use her tutorial on diaper cover.

You can read up and decide for yourself which style to sew up and then jump in the tutorials from these sites.  If you like my tankini with attached skirt, read on to see how I do it.


Get these supplies ready before you sew:
1) stretch needle
2) stretch twin needle
3) swimsuit elastic (the regular woven 3/8" elastic I got says for "swimwear" so I just use it)
4) swimwear fabric like lycra - I got these from the shops at Chinatown.
1/2 yard lycra in skin tone for the lining. 1 yard of black polka dots   

3/4 yard of pink ruffle lycra
Needles
My twin needle broke twice so I had to break the sewing mojo during the KCWC to buy more! Spotlight carry it for $9.95 each so I was quite hesitant to get more. But, the good news is I found a local sewing shop that carries all kinds of sewing needles and sewing foots, at very affordable price! If you are interested, let me know and I can share the address with you. Bought twin needles there at $6.20 a piece!

Why Tankini with attached skirt? 
Like I said in my last post, I was not allowed to sew the one piece swim wear since my girl refused to wear them. She also didn't like the black polka dots lycra that I bought for her and instead prefer the pink ruffle one that I had plan to use it for the younger sister. Since I only got 3/4 yard, I have to plan really accurately in order not to waste it. The yellow ruffle tankini that Dana made for her girl is cute but my girl prefer to cover her butt. I wanted the tankini to have some shape so that it don't float up when she jump into the water so it had to be quite tapered and flare a little at the hip.


Pattern
You can either trace an existing swim suit that you have to get the basic bodice or download the free pattern from Zaaberry's 5T one-piece swim suit and grade up/down accordingly.  I used both since I'm sewing up for 2 sizes - 7T and 2T.  Let me explain further below.

1) I printed the 5T pattern from Zaaberry and decided that it will work if I add seam allowance and maybe lengthen the bodice since my 7 year old is skinny.  As I want the pantie to be separate from the main tankini, I cut off about 1" below the waistline.  You can make a rough estimate here by measuring your kids.  I cut a slope downwards as I want my tankini to shape slightly longer in the middle. 


2) For the tankini bottom (the part that you cut off, place a piece of paper behind and level up the waistline so that it is straight instead of sloping down. Do this for both the front and back piece.


3) I decided to go for a continuous tankini bottom as recommended by Emily from Creative Chicks.  You can refer to her tutorial for the details.  See below on how I tape the front and back pantie pattern together at the crotch area. For my 2T, I use Dana's diaper cover as a guide instead since she is still a cute baby!


3) For the skirt, I cut a rectangle. Just estimate the width by measuring the width of the bodice X 2 for front and back, and add seam allowance. The lenght is up to you. For my 7T, I use 7" and my 2T, I use 5".


Seam Allowance
If you are following my method or tracing from existing swim suit, please remember to include Seam allowance (except for the folded part) as you will need to insert elastic band and fold in the fabric later. I use 1/2" seam allowance for all so that I've more allowance to work with.

That's it for pattern and will talk about the cutting in next post.

Thursday, May 3, 2012

Quick tip on Reversible Bucket Hat


Have you tried the Reversible Bucket Hat from Oliver + S's "Little Things to Sew"? I love it that it comes with many sizes.  I've made 3 sizes in all - Large, Medium and Small.

Why 3 hats when I only have 2 girls you may asked? Well, the Small that I made was a tad tight on my 2 year old so I decided that it would fit Dora the doll better.


And, off I went to sew up 2 more.  My girls insisted to have the same pink fabric so in the end, I had 3 hats in the same shades but different sizes!

This being the 2nd time sewing up the hat, I decided to do something different which I think helps to speed up the process and make the hat easier to sew.

Interfacing
The pattern call for interfacing only the the Brim of Fabric B but I find it to be too weak and the hat didn't stand up well. Maybe it's the fabric that I chose is more light weight so if you are like me, you can use  medium interfacing and interface on the top, sides and brim of Fabric B. It makes the hat sturdier. Didn't interface the Fabric A as I'm afraid it will be too stiff.

My modification
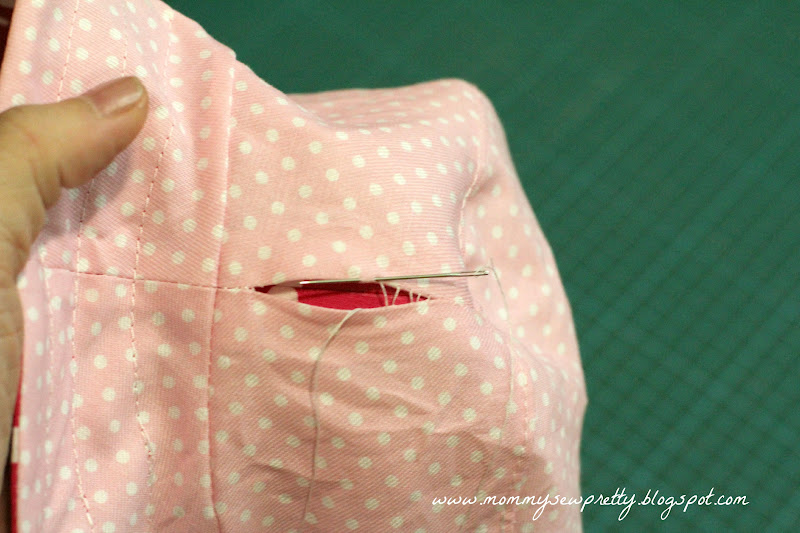
When sewing the side panel of Fabric A together, leave a 2" gap in one of the side seams. For the other side seams, follow the instruction to stitch the whole side seams.  Then pin the side panel to the crown and sew.  You will need to clip the curves of the side panel in order to fit to the crown. Do the same for Fabric B but don't leave any gap in the seams.


After you have sewn the side panel to the crown, sew the brims as per instruction. Like the side panel, you will need to pin a lot and clip the curves on the brim to get them to fit.  First pin the side seams and notches and then later add 2 more pins between the 2 pins.


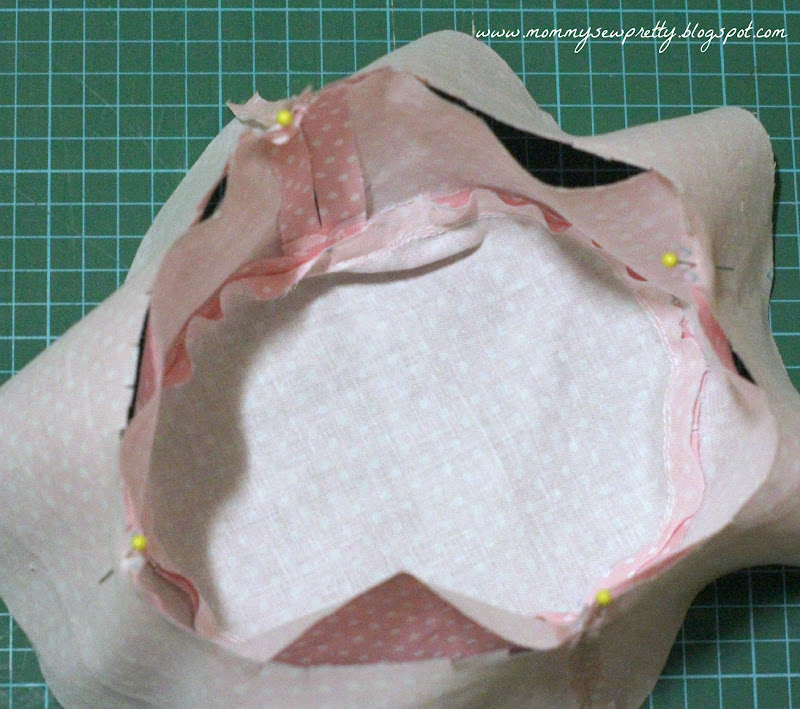
The next step, I did differently from the book. I put the 2 hats of Fabric A and B, Right Side facing, into each other, align the seams.


Sew up the full brim with 0.25" seams allowance. Clip the curves and turn the hat Right side out through the gap in the side panel.


Use pins to press the edge before pressing it with iron. Then, topstitch to make the edge neat.  Stitch the gap close with whipstitch. I did a few rounds of stitches around the brim so that it will have more body.


See, this is much easier than the recommended method to hand stitch the external cap to the brim. Or maybe it's just me that don't like to hand stitch since my workman ship is not so neat. In any case, the instruction by Oliver + S is really clear and I love to try more of the projects in the book soon!


Tuesday, May 1, 2012

My last sewing for KCWC

I've not done a lot of sewing for this round of KCWC. Only managed to make 2 knit tops, 3 hats (yes, I made 2 more after that. Will share a quick tips on sewing it up really quick and easy soon) and lastly, 2 swim suits.

Much as I wish to be more productive, I was tired from work.  The spirit is willing but the flesh is weak : (

Anyway, here's my last piece of work for KCWC.  A tankini with attached skirt! 

A tankini with skirt

My older girl refused to wear the traditional kind cause she said she is conscious of her backside. So I had to make her a tankini with a little skirt.

Nowadays, I can't just stop at one. Gotta have the same kind for little sister, or else!

A mini version for little sister

The 2 are quite identical except the difference in the way the straps cross at the back. 

I really love the bright colors. Got the lycra ruffle fabric from Chinatown.  Since I had originally had in mind to only make 1, it is a challenge to squeeze out 2 using only 3/4 yard.

And of course I made them matching panties to go with their new suits! I didn't want to attach the pants to the suit as I hope they are still able to go toilet in the midst of playing in the pool without having to struggle out from wet swim suits.


For my older girl, I adjusted a one-piece swim suit pattern and make reference from one of her pantie. Added the ruffle skirt around. Little sister's was from Dana's diaper cover tutorial, except that I added the ruffles. 


I'll share more on how to in my next post. Still on my sewing table is one shorts for me and a skirt for the little one. Come back soon.