Showing posts with label doll. Show all posts

Friday, January 18, 2013

Doll Carry Basket


For the last Christmas, my girls got the Baby Alive toys from their doting Uncle and Aunt. I thought it will be lovely to make a doll basket for them to carry the dolls around.

Here I'll just be sharing some tips on how I made one. I didn't really look for any tutorial since it is basically a oblong base with side panels and straps.

First measure your doll to get the rough size how big your basket should be. Leave some ease for the little hand to put in their baby and blanket. My doll is around 14" tall and I made it to 16" long.


You just need 3 basic shapes (base, side panel and strap) and 2 fabric for outer and inner basket. I use fleece to make it soft but you can also batting or interface the fabric to make it stronger. To make the base sturdy, I insert a plastic canvas in-between the fleece/batting and main fabric.  

Here's how I did it.  First, cut all the pieces out.


Then, sew the base Lining piece to the fleece/batting but leave about 10" gap unsew along the middle portion to insert the plastic canvas. Once you inserted in, sew up the gap. Set aside.


For the Inner side panel, I also sandwich the main, fleece and inner fabric and do a simple quilting so that it will be strong and will stand since I didn't interface the fabric. I think I should have done it to make it sturdier.


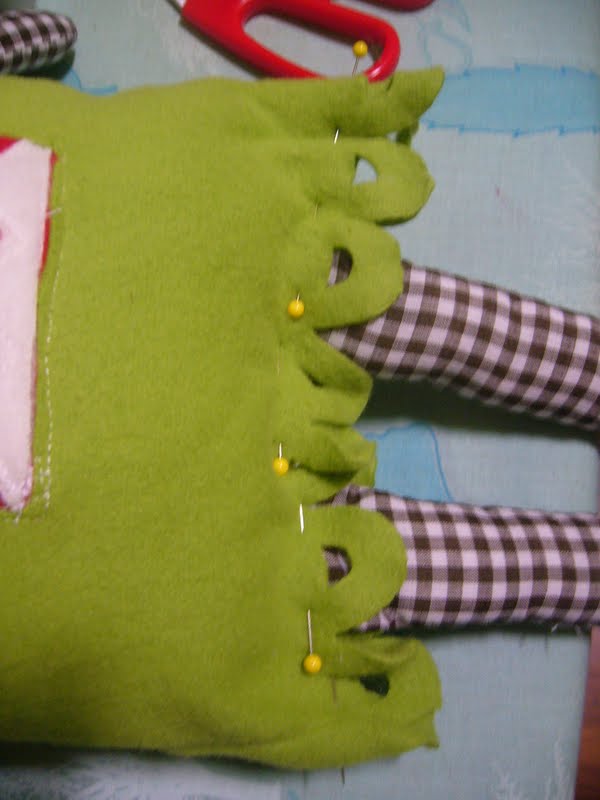
Right side facing, place the side panel onto the base, starting from the top middle portion and start pining away. Try to align the raw edge and coming to the end points, leave about 3" unpin and sew up the side seams of the side panel. Then, pin the remaining side panel (which is now a loop) to the base. This will ensure that your side panel fits the base exactly.


Do the same for the outer basket except that there is just the Base + Side panel, without the fleece or plastic canvas to battle with.  Insert the inner basket into the outer basket, align the side seams.


Pin like crazy along the top edge. Then, sew all around the top edge.


Take a double fold bias tape and start pining along the top edge that you've just sewn.


Sew around again.


Next, take the 2 long stripe and sew them right side facing along the long side and turn it right side out. Do the same for the other 2 pieces. Fold in the raw edge on the short ends and sew them onto the basket.  Measure your kid so you know how long you want the strap to be.


And, there is your Doll basket! Add a pillow or blanket and your baby are good to go.


Friday, December 16, 2011

Felt Finger puppets

My girl wanted to learn sewing and I thought felt will be a good starting point.

We browsed through some sewing books on felt and came across some cowboy finger puppet. She was really excited on the idea to sew something herself.

First we brainstormed on what she wants to make. She decided that she wants a girl and a boy. She choose the color and I helped her to cut out the tiny pieces like hair, main body, skirt, shorts etc. 

I taught her the basic on threading the needle and helped her to tie the knot at the end of the thread. She did most of the sewing for the hair, skirt and top. I helped her to sew up the eyes and mouth and the shorts since it is neater and faster, of course.  I was doing my sewing and teaching her at the same time.


I would say she did well for a 6 year old. I'm impressed that she didn't get pricked by the needle and is able to handle the needle well. I chose a bigger needle with a bigger eye so she can thread easily.

Her finished product! the skirt, shorts and top can be taken out. likewise the long hair for the girl can also be removed. 

Thursday, October 27, 2011

Dolls and such

Have you seen fabric with front and back of dolls or animals printed for easy sewing of dolls. It's so easy to sew up a doll from these fabric.


Just cut around the dotted lines and place them right side facing and sew all around, leaving a small gap for turning the doll over. Stuff them up and sew up the gap and you have your dolls.

I bought this fabric from a shop at Textile centre for $12.50. There are 4 dolls designs and come with 4 types of animals too.


And I sew them up into these...


4 cute dolls and their animal pets. So adorable and quick. If you want to make some, drop by Textile centre and get one of these pre-printed fabric to make some. I think they have another design too.

Pin It

Thursday, August 4, 2011

Colours of Rainbow!

Bought this from Spotlight last Sat and

made this...

I was inspired by this skirt . It was love at first sight. I'm definitely going to make one for myself soon.
It has a box pleat infront and gathered elastic band behind. I only made 1 pleat in the middle.

A closer look at the pleat

Simple Instruction for the Skirt
It's made from a rectangle piece of fabric sewn at side seam. It's quite simple so I'll just do a brief write up.

You can use the same measure of a simple skirt.  Decide which is the front facing and put a pin to the middle centre line in front.  Fold in 3" at left and right from centre line of skirt to make the pleat. (You can make it any size you want cause the elastic band at the back will adjust the waist by itself later).  Sew a basting stitch to secure.

Then, fold in about 0.75" (depending on the width of your elastic band) throughout the whole waistline at front and back.  Press and sew a straight stitch near to the serged edge of the folded waistband to make the casting for the elastic band. Just make sure that you leave an opening at the side seam of the skirt to insert the elastic band.  Then, topstitch very close to the top edge of the waistband.

Note that the elastic is only for the back portion, so you only need to cut half the waist length. Insert the elastic band through the opening at side seam and all the way to the other side seam/side.  Pin the elastic at both side seams and sew securely using a straight stitch at the 2 side seams across the elastic and skirt casting. Sew over the opening, hem your skirt and you have your pretty skirt!

I love the vibrancy of the colours. So, I went a bit crazy and made a matching skirt for one of her doll.  It's a simple skirt with elastic band.

Did I stop here? NO! I went even more crazy and made a fabric belt using the remaining strap.

Simple instruction for fabric belt
I sew up 6 strips of 1.5" wide fabric at the short edge to make 2 long pieces of 3 straps each.

Then, iron heavy weight interfacing on both the Wrong Side of each long strip.  The interfacing should be the same size as the strip but minus the seam allowance so as to reduce the bulk. 

After that, with Right Side Facing, align the seam and sew up all the edges of the strip, leaving 2" opening in the middle of the long strip for turning it Right Side Out. Clip corners and turn it Right Side Out.

After you have turn it out, press with iron and top-stitch close to the edge on all the sides, making sure to catch the opening in the middle. 

Insert 2 D rings (make sure size fits) through one end of the strip and fold in 1" and sew to secure.


The belt is complete. Just loop the other end through the 2 D rings and then back through 1 D ring to secure.

Phew! At the end of 4 hours, I'm done and ready for bed. Yawn...Can't wait for my girl to see the rainbow assemble : )

Tuesday, June 21, 2011

Monster Inc

I made any soft toy but it's not a doll.  It's a green Monster for my nephew.  I felt sorry that he was not included in my gifts of dolls since he is a boy. But he asked for a monster instead so I decided to sew him one.


Since it's a monster, I just go with anything in my mind. I had in mind a green rectangle monster with red mouth and white teeth.  The final monster looks cute with the checked hands and feet. You would recognise those as the scrap left over from my husband's shirt!

It's really easy and you can try them too.  I've used fleece but you can just use regular cotton fabric if you want. 

Cut Pieces
Green body (2 pieces) measure 8"X 11"
Red patch for mouth (1 piece) measure 3.5"X 2"
White patch for teeth (1 piece) measure 3.5"X 2"
Square patch for eyes (2 pieces) measure 1.5"X 1.5"
Black scrap for eye balls
Fabric for legs (4 pieces) measure 7"X 2"
Fabric for hands (4 pieces) measure 4.5"X 2

Instruction
1. To sew the eyeball to the eyes, place the black strap ontop of the white square and sew a circle/square right on top of the black scrap.

2. Trim away the excess fabric around the sewn area and you have your eyes! Do the same for the other piece.


3. Place the eyes on the monster body and pin in place. Sew the eyes onto the body. Since it's a monster, I go for a square eyes. Trim away the excess and put aside.


4. For the mouth, place the white piece ontop of the red piece and pin in middle. Sew a zig zag line on the top and bottom part of the pieces.


5. After you have sewn the 2 zig zag lines, cut through the white piece in the middle. Be careful not to cut through the red piece!


6. From the cut middle line, you can cut away the excess white fabric close to the sewn zig zag lines.  You will now see your mouth. Does it looks scary??


7. Take your main body piece and draw an outline of a rectangle measure 3"X 1"and 6/8".  Cut out the space. This is to sew your mouth piece in.

8. Place your mouth piece behind the face and sew around the rectagle. Make sure that you sew the piece securly in place.

9. Pin 2 pieces of the legs together with right side facing in and sew around the edges, leaving the top edge unsew. Do the same for the other leg piece and the 4 hand pieces.

10. Turn them right side out and stuff with fibre fillings. Sew edge shut.


11. Pin and sew the leg pieces to the bottom of the body (wrong side facing up). This will be enclose inside the body later when you place both body pieces together. I've used this method as I want to keep the pattern at the bottom of the body piece in tact.

12. Turn the body piece over so that right side face up. Pin the hands so that the pieces are inside the body.

13. Place the face body piece onto of it so that the right side face inside. Sew around the circumference of the body pieces starting from bottom left. Leave the bottom edge unsew.

14. Turn the body pieces from the bottom.
It looks like a puppet now : )
15. Stuff the body with the fibre filling and sew the ends shut. You have your monster now. 


Hmmm...this monster reminds me of Dora's the explorer's bagpack! Hahaha...

Tuesday, June 7, 2011

Doll, doll and more dolls!

Remember the black apple doll that I made earlier for my girls? She wanted more. Much more. To be exact, 26 dolls in total! She had in mind to name them each after an alphabet. I've already made 3 earlier and their names are: Apple, Belle and Crystal!

meet Apple, Belle and Crystal!
I made her another one.
A bigger version with plaits and tights!
This one is much bigger than the previous ones and I added the plaits. So sweet. On hindsight, I shouldn't have use knit for the body cause it stretch and my dolly seems to have a big bum! Added the ruffle at waist for more variation. She looks this one.

So, I made another one for her little sister.

ponytail sweet little thing
It has a cute fringe and pony tails. A little polka dots ruffle infront added the sweetness.


Guess what, I made yet another bigger one. Talk about obsession!

The little sister loved them! She woke up the next day and hug all of them!


Did I stop there? NO! I made just one more for my little niece : ) Well, a girl can't have too much dolls right? I'm now getting so good at this one that it all done in 1 hour time! beam beam!
Thought I"ll add a detachable tutu for this one!