Showing posts with label dress. Show all posts

Thursday, May 8, 2014

Galaxy Dress


I fell in love with this galaxy print cotton from Fabric.com. It reminded me of a dress I saw from this Japanese magazine Female Autumn 2013 issue.


I was contemplating if I should sew up the exact version but I think the loose fitting dress is going to make me look preggy.

So I decided to sew up this dress from the cover of this Japanese book.  It's Simple Chic by Machiko Kayaki.


I think the dress is quit unique since it has 2 diagonal darts from the side waist up.  You can just catch a glimpse of the diagonal dart from the photo below.


The lines on the dress is quite simple. A line with 2 darts so it will not clash with the busy print. The blue is so rich and it is a good weight to sew, not flimsy at all. I would recommend this if anyone is interested in galaxy print.


The above is the photo of the back view of the dress. The print seems to make the seams so invisible right? You can hardly see the invisible zipper at the centre back! I am so tickled!

The original pattern neckline is too high for my liking so I brought it down by 1". Maybe my neck is too thick. lol I line the dress with Japanese nylon lining fabric that I got from Spotlight. It is slightly expensive at $13 per metre but I think it is worth it because it is anti-static and feel so cool against my skin.


Here's how it looks on my dress form. I can actually zip up the dress! The original pattern dress length is really LOOONGGG. I took off almost 3" and it is just below my knee. I think might need to take off more. I'm 1.60m. Not sure if its because Japanese ladies like their skirt long or I'm too short.


Will be wearing this for the upcoming Mother's Day church service so no photo of me wearing it here. I might post a few celebrating photo later though.

My birthday is in May and I've a birthday surprise for my readers! Look out for it in my next post!

Thursday, April 10, 2014

Piano Recital Dress


Recently my girl had a piano recital at the Esplanade Library.  She was super excited and asked me to make her a dress.

The pattern is from this Japanese sewing book called "Recital dress for Girls".


She wanted an exact same dress in dark navy blue.  So I bought a dark blue stretch gabardine and a lining from Spotlight.  Can't remember what's the lining called but it was tagged as Japanese lining which is quite expensive but the drape was excellent and felt so smooth and cool against my skin.


Here's my take of the dress. I followed quite closely to the instruction  and cutting layout which is very useful. I adjusted the strap by 4" because it was quite long.  I love the wide swingy skirt.


It was hard to photograph the dark colour dress so I have over exposed the photo to show the dress here. The previous photo is more of the true colour. The dress fits here very well and even my family didn't realised that I made the dress.


One of my favourite part of the dress is the big ribbon bow at the back.  The construction of the bow is very special. It is constructed with 5 pieces - 2 bow pieces, 2 ribbon pieces and 1 bow loop. The bow is then threaded through the self-made belt.


The big bow really enhanced the dress. I think it is especially important to have a big bow behind the dress as that's what people will see when you are playing on the piano.  But because the bow is quite big and heavy, it drag on the belt and make it sag a bit.


And because the dress is quite heavy with the lining, I sew on 2 ribbons just below the arm hole side seams to reduce the stress on the strap when I hang the dress.


It was a good experience and I really enjoyed the learning journey of sewing a formal dress.  If you are interested to sew one, you can find the book at Kinokuniya under the Japanese book section.


Friday, March 28, 2014

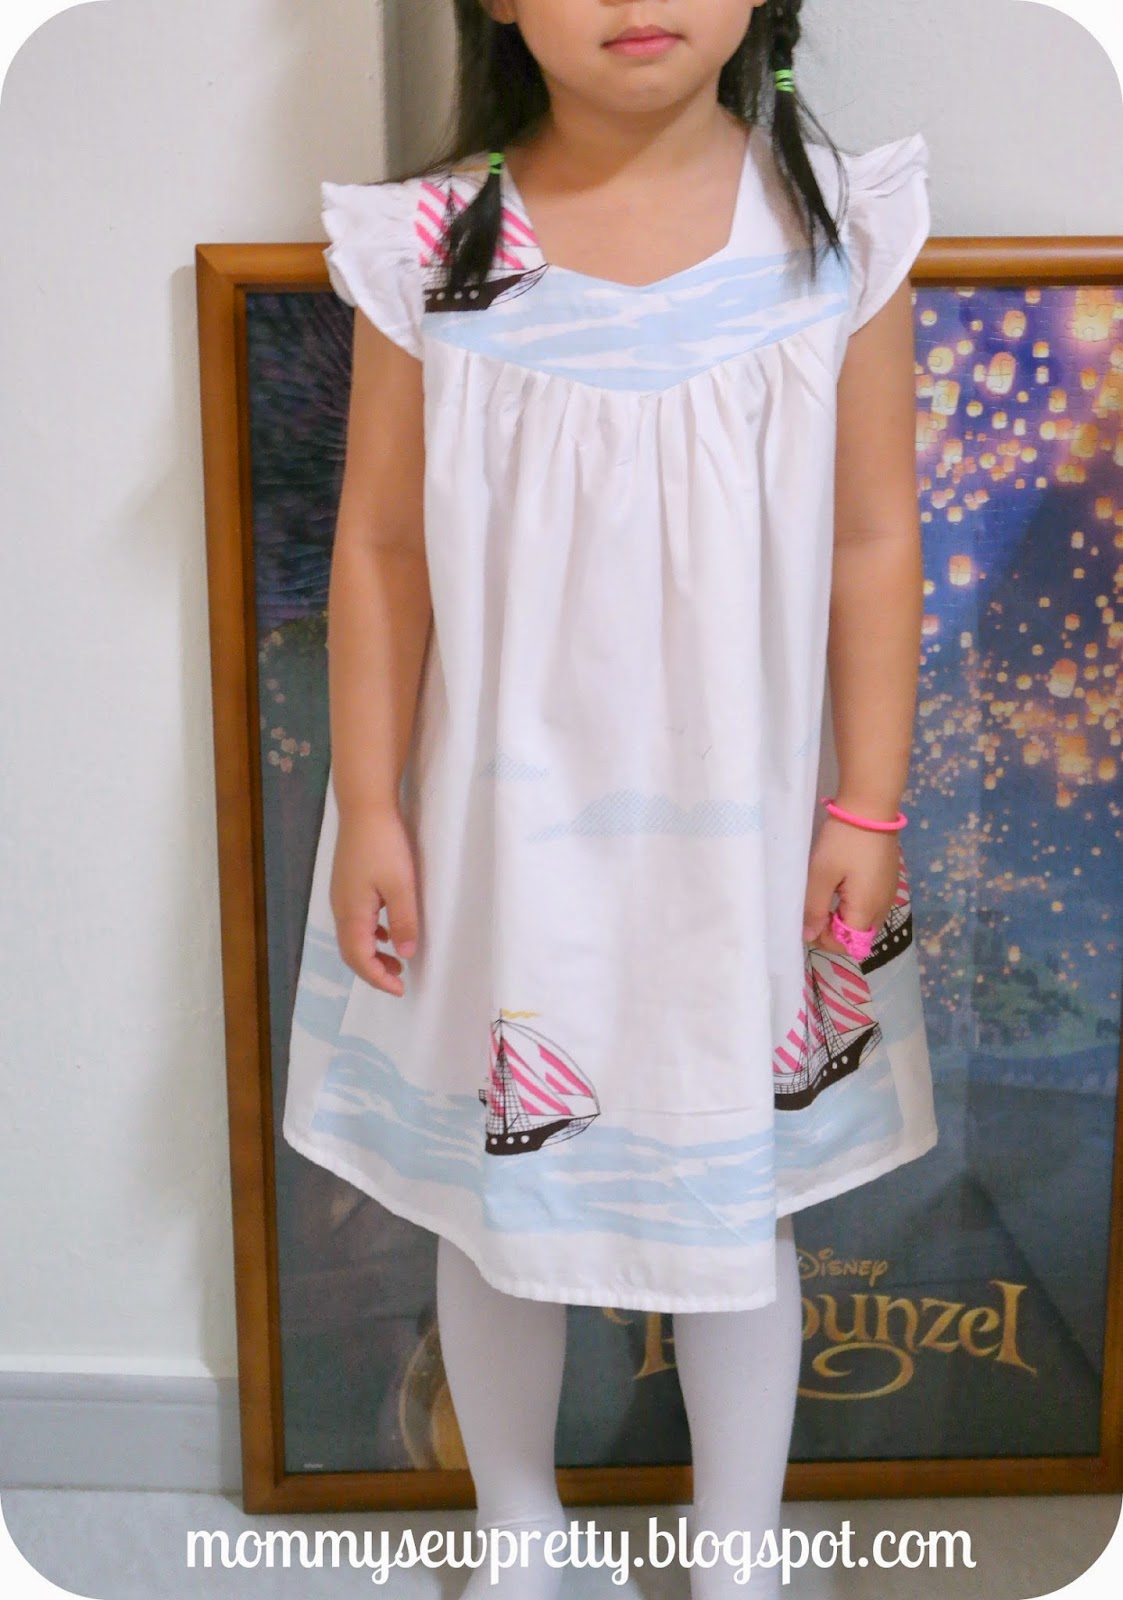
Sailboat Ruffle Dress


This is one of my favourite dress that I've made for my girl.  One of the reasons is of course the use of my favourite Out to Sea fabric by Sarah Jane.

I used a pattern from this Japanese Book.


The pattern is without lining but I added lining because the fabric is a bit sheer.  And the lining really make the dress full and fluffy because of the gathers.


I fussy cut the front yoke with the sailboat on the left shoulder and make sure the sailboats are on the hem of the skirt.  I love the sailboat on the yoke and the seawater makes it looks really special.


Here's the back view of the dress.  I also fussy cut the cloud to be on the back yoke portion but it is not so clear in the photo.


The ruffle is also very pretty and add just the right girly factor to the dress.


Alas, I've only bought 1.5 yard and I was greedy to try to squeeze a dress and a skirt so the back and front is not match nicely : (

But it is still a cute dress and I'm so happy the way it turns out.  I'm so happy that I will photo bomb my girl in her dress..hehehe... I'm a proud mama!


EDIT TO ADD: March 30/14
I’m linking up to this Link Party.
Make It and Love It

Wednesday, February 5, 2014

Tutu Dress - Chinese style


My girls love tutus.  So, I decided to make them a tutu dress for the Lunar New Year.

Little sister got the Pink and Green combo


While Big sister has the Purple and Pink combo


The pattern is from Violette Field Threads' Chloe.  The bodice fits both my girls very well.  But I did the skirt differently since it was really thick.

For the bodice, I added the bias tape trim to create a curve feature and add on 3 frog buttons.  The bias trim is also added to the bodice edge.


Instead of a separate waistband/ties, I just measure the desired length I want and insert them to the side seams.  Just make sure that you insert them about 1/2" or 1" above the bodice hem as you will need to account for the seam allowance that will get attach to the skirt.


I also do away with buttons since I really dislike sewing button holes.  Invisible zipper makes everything looks so neat don't you think so?


Have you notice something different here?  The skirts are detachable! This is more practical and versatile.  So, I use my satin and sew them a gathered skirt and attach directly to the bodice.


The detachable tutu was made up of 4 layers, excluding the inner skirt. I think it makes it more poof and so much more work to gather them! After I gathered all the tutus together, I attach them to a waistband cut from the same fabric as my inner skirt.  The waistband is then threaded with elastic so that they can take it off easily.

For my Big girl, I use pink for first layer, purple for 2nd, white netting for 3rd and pale yellow tulle for 4th layers.  The waistband is in purple, same fabric as her purple satin skirt beneath.


Little sister's tutu skirt is made with Green at top layer, pink on 2nd, white netting for 3rd and pale yellow tulle for the 4th layer. Her waistband is pink satin, same as her satin pink skirt beneath.


The dress without the tutu is just as sweet right? Pardon the crease, I've her tried it on before ironing.


They love the dresses.  So festive and yet versatile. They can wear it without the tutu and it is simple and sweet dress.

And if they feel like it, the tutu is really swingy and princessy.


They got lots of compliments from relatives and friends when we went visitation during the Lunar New Year. Felt so proud as their mama. : )


So, did you make any dress for this lunar new year?

Tuesday, November 12, 2013

black knit dress


Made a simple dress for my winter trip to Hokkaido.

Pattern from the japanese book that I had earlier made a ribbon dress from.


The pattern is for non-stretchy materials but since i've used knit, I skip the zipper. But my knit is quite thin and stretchy so I underlined with with a thick lycra in black. I sew the them together, wrong side facing, and treated them like one piece before sewing them together. So, it was a bit heavy since my lycra is quite heavy.


It is quite loose for me and just nice for layering. The V neckline is also quite flattering.  I thought I can pair with a belt and see how it looks.


hmm.. looks quite nice.  Another option when I feel more dress up. But I think it will still look nice with tights and boots.

Tuesday, October 29, 2013

Colour block hoodie dresses

Another Hoodie, this time a dress!


The hoodie on the left is from the pattern from Ottobre design 4/2013 'Pentagram Hoodie' size 140 while the one on the right side is adapted from 'Beagle Boy Striped Hoodie' size 104.  I said 'adapted' because I use the measurements of Beagle Boy hoodie but copy the design from Pentagram Hoodie because the smallest size offered is only 128.


Let's talk about the Pentagram Hoodie first.  The original pattern uses different knit print for the pockets, hood and cuff so I decided to color block using pink and purple. Both favorite colors of my girls.

On my oldest request, I change the combination so that they are not identical. Something about the 3 year old wanting to wear the same clothes as her Big Sister but the feeling is not mutual!  The fabric used is Winter fleece from Fabric.com. The fleece is not as soft and fine as the micro fleece but still soft but much thicker.


Changes made to the Pentagram Hoodie:
  1. Added lining to hood [cut hood lining slightly smaller so that lining will not show out at edge]
  2. Omit hood ribbing since I'm going to line the hood

I use the decorative stitch for the hood facing, sleeve hem and the joint between the bodice and hem band.

For my younger girl, changes I made:
  1. Lengthen the hoodie to tunic/dress length using 128 size of Pentagram hoodie
  2. Added a new Hem band of 5"
  3. Flare out the hoodie by 1.25" on both sides so that it is more A line [I think this looks much better than the original Pentagon hoodie]
  4. Add Kangaroo pocket using the same template in Pentagram hoodie
  5. Add lining to the hood


She loves to put her hands in the gigantic pockets.  Sleeve is very long and it covers her fingers.  The hood is large and totally cover her head when she pull it over. I think the A line shape is more flattering than the original Pentagon tunic straight cut design.  


Add bias tape to the pocket opening
I used another decorative stitch on my machine for my younger girl so that it will be different from her sister.  Notice the color blocking is different for both girls?

Note to self:
I used stretch stitch (2.0 zig zag and 2.5 stitch length).  The tension used is 5 and pressure foot is set at 3 to account for the stretch fleece.  I also used walking foot for the entire sewing.