Showing posts with label wallet. Show all posts

Friday, March 23, 2012

Pretty Floral wallet


Remember my last post on wallet?

This one is about the same design but slightly longer and wider. About 8.5" by 4.5" when folded.  This time, I remembered to sew on my label! Let's look inside shall we?


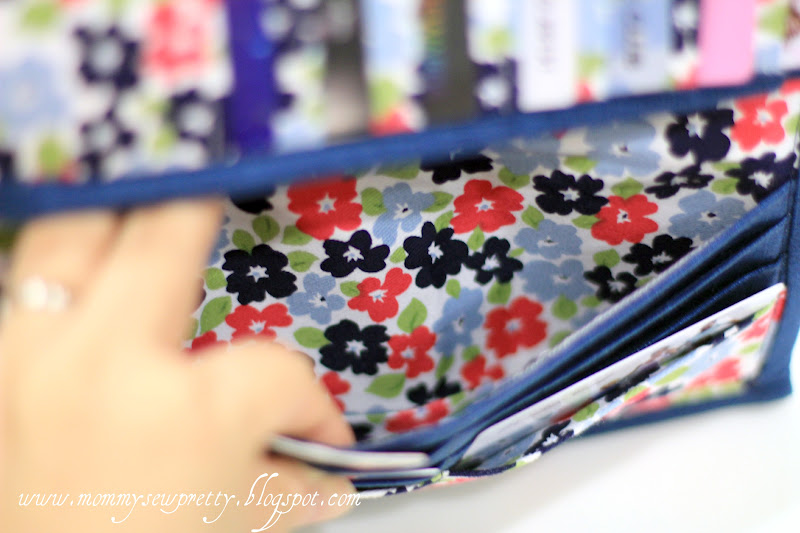
Inside is about the same as my last wallet except that one side has 7 card slots facing upright while the other has the usual 6 slots facing the other direction.  Here's how it looks with the cards all in.


The floral print is cotton from Spotlight and the dark blue is quilting cotton by Robert Kaufman. What I love is I got 3 hidden card slots behind the 7 card slots! Look, I can keep more cards, and doesn't add bulk to the wallet : ) I can also use it as receipt pocket too.


On the other side, behind the 6 card slots, I've the cash compartment.

The back receipt pocket that is made bigger from version 1. Good size to fit in more cards or receipts or any rubbish that I chuck here.  I can even fit in my handphone nicely and still remain slim. 


And, because it's bigger, my coin compartment is also bigger.


I love this version. And I got an order from my sister to sew up one for her too! Maybe I should put in the strap so it can function as a clutch. What do you think?

Wednesday, March 21, 2012

Fat quarter wallet anyone?


I had many fat quarters that I bought some time ago and I only used them to make some laptop bags and they have been lying in my room, being pretty and all.  So, I decided that I should cut into them and make some useable items instead of storing them away.  

It is still a struggle for me to use them cause I can't bear to cut into them! Do you feel that way too? I"m not sure or maybe it's just me.  I'm afraid that I'll waste them away if my project turn out bad or I cut them wrongly. 

Anyway, back to the topic of sewing wallet.  I decided to do it differently from the last 2 time.  I wanted lots of card compartments so made 12 card slots for this one.  I keep it simple and flat so that it will still look slim.


The yellow fabric is from Hullabaloo by Urban Chika for Moda and the grey one is Dandelion flora by Patty Young for Michael Miller.  Love the color combination. I've bind my wallet with bias tapes as the interfacing is too thick for me to turn it right side out.

  
I've put the coin compartment at the external back because I find it more accessible for me and I don't need to flip open the wallet to put in the coins. It has a back receipt pockets for me to insert the receipt from supermarket! But I find it too small so in my version 2, I make it bigger.


Inside, I've 2 cash compartment behind the 6 card slots.  Love the nice dandelion print.  I've also took some time to match the fabric combination.  All in all, I use less than 1 fat quarter for each color. 

I didn't really take photographs of the steps as I invent along the way. I did another wallet cause I thought if I change the direction of the card slots it will be more interesting.  Look out for my next wallet post.

Monday, December 19, 2011

Wallet for Mum

My mum loves the last wallet that I made so I decided to make her one in the Christmas color of Red and Green.


She didn't need so many card slots so I do away with the middle card slots and just have 4. Love the details of the flower prints on the receipt pocket peeping out from behind the card slots.


A closer look at the coin compartment with the cute flower print. The bias tape binding is the same one that I made and used in the other wallet.


The notes compartment has nice print inside too!


Since she is not on internet, I can share some photos of the wallet. I hope she likes it and will use it often : )

Friday, November 25, 2011

Felt Wallet

This is the last year of pre-school for my girl. Next year, officially, she will be start her 6 years of Primary school education. She is going to a new school and I'm sure she will missed all her friends.

So, we decided to make a small tokens to giveaway for her friends as a goodbye gifts.  Well, I think it is more meaningful to handmade gifts than buy. Why buy when you can sew right?

So, we brainstormed and decided to sew felt wallets for her friends. The wallet can be used to store the Ezlink card which is a cashless stored value card that we used to travel on public transport. It's easy and she can decorate felt flowers, ribbons and the likes on them.


Here's how I made them.

Material
Some coloured felt which you can get a wide selection in bolt from Spotlight of pre-cut from Daiso.
lace, ribbons, buttons etc for decorating

Instruction
1. Cut the felt into 8" X 4.5".

2. Fold 2.5" up from the bottom to form the holder. Press with low heat iron to form the fold line and pin the 2 side seams.  Sew with 0.25" seam allowance from the bottom all the way to the top and down to the other end.


3. Fold 3" down to make the flap and iron to create the fold line. 


4. You can sew lace or ric rac over the top of the flap to decorate. Or hot glue some flowers, ribbons, lace.

5. Sew or use self-adhesive velcro tapes on the flap and holder. 


There, all done! Now time to write some farewell cards to insert to the bags before the giveaway.


Monday, October 10, 2011

A new wallet


I love the coin compartment. So neat : )


In total, there are 20 card slots, 1 coin compartment, 5 receipt compartments and 1 cash compartment. Wow! It's rather FAT when I fit everything in.

If I were to make this again, I'll eliminate the centre 16 cards slots or join have 8 slots. It's very thick and when I fold it, with its red cover, it looks like a block of brick from afar!

But I still love it. Its very functional and pretty. I've used 4 types of fabric here. Bought the pattern from an etsy store Napkitten. Instruction is pretty clear but you need to be an advance beginner sewer to do this. Alot of sewing through thick layers.

I've followed the instruction quite closely as it is very confusing with so many pieces.  I start off by planning the colour schemes and cut out all the pieces and stick post-it pad to help me identified the parts later. Used interfacing for all instead of canvas pieces in between. Use magnetic snap instead. I hand stitch the bias tape for the front cover as it is very thick and I'm afraid that the difference in the card slots will affect the alignment if I machine sew.  For the rest, I've followed the instruction to the T.

Inner card slots: Pink - Doohicky Designs Hoo's In The Forest, Flower Jacks Pink; Green - Michael Miller Ta Dot Celery.  Both from Fabricworm.
Outer Red - Can't remember the name. It's red with white boxes and got birds and squirrel motifs. Also from Fabricworm.
Red background with white dots - some cotton fabric I got from Spotlight.

Okay, tomorrow I'll share the vest for the KCWC Day 1!