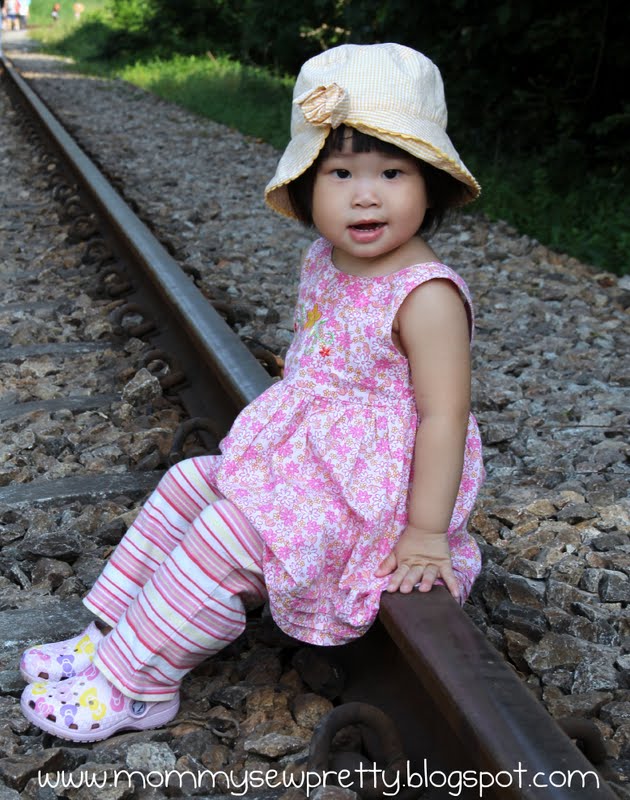
I jumped on the band wagon and made a Knot Short for my girl. Didn't have the guts to make one myself but it's so lovely and I had to do one. Don't you think?
The next day, we went over to the old Railway track near Bukit Timah for a family photography outing. It was a hot and crowded afternoon. Soooo many people was there. The railway was closed recently and had used to ply between Singapore and Malaysia. It holds lots of memories for many and so many people were there with their cameras and even a wedding couple were there to take photos!
Tuesday, July 19, 2011
Sunday, July 17, 2011
Baby Bloomer and pants
When I did the pajama pants for my elder girl, I decided to make some pants for the younger toddler. Since I've 2 kids, I always try to be fair and make things for both. Well, it's nice to see them excited about wearing clothes that mummy sew.
As a no. 2, she has lots of hand-me-down from her bigger sister and my friends whose girls have outgrown their clothes. So, she has lots of pants but not alot of diaper covers or bloomers. I decided to make one, copied from an existing one that she already has. Bloomer is a short pants that has elastic band at the waist and leg opening and usually it's around the knee area. It'll compliment the tops that she has.
It's really easy if you are comfortable with sewing with thin strip of elastic bands. Ready to try?
Measurement
For a tall 18 month toddler
Waist = 16" (included diaper allowance)
Length from waist to crotch = 10"
Width of leg opening = 12"
Materials
Light cotton fabric
0.25" width elastic for waist area (16" long)
0.25" width elastic for leg area (2 pc of 10" each)
Cutting Instruction
1. Fold the fabric Right Side Together and cut out 2 folded rectangle of 9" X 12.75". [note, when you open out the rectangle, it should fully measure 18" X 12.75"].
2. Then cut off a triangle at the bottom corner of the fabric that is 2" by 2" to make the crotch. Do the same for the other piece.
Sewing Instruction
1. Sew the crotch area together, Right Side Facing, starting from the middle and down to the bottom, using 3/8" seam allowance. Do the same for the other piece.
2. Serge the crotch seams individually as well as the leg holes. Press open the seams.
3. Fold up 0.25"of the leg hole and press. Sew close to the edge.
4. Pin the 10" elastic band round the leg hole starting from the inseam area, about 0.5" away from the edge of the hem.
First, put the needle down at the beginning of the elastic band and then pull the band taut. Pull and sew as you go round the leg hole. Make sure that your batch stitch when you sew and back stitch again when you end. Do the same for the other leg hole.
5. Turn one piece Right Side In and the other Right Side Out. Put the Right Side Out piece into the Right Side In piece, align seams. That means, Right Side of both pieces face each other.
6. Pin and sew the inseams together. Turn it Right Side out and you have your bloomer!
7. For the elastic band waist, serge the waist band and fold in 0.5". Press and sew a straight stitch around the waist near the edge, leaving 1" gap for inserting of elastic band.
8. Overlap 0.5"of the band and do a zig zag stitch to close the elastic band.
9. Push the band back in to the waist band and pull it taut. Sew the gap close and you have your bloomer!
By the way, I sew her a pants too. But, it didn't fit my girl so I gave it to my friend's baby boy. It's a bit long but size should fit eventually. The fabric is from Spotlight. Looks so cute for a boy don't you think?
As a no. 2, she has lots of hand-me-down from her bigger sister and my friends whose girls have outgrown their clothes. So, she has lots of pants but not alot of diaper covers or bloomers. I decided to make one, copied from an existing one that she already has. Bloomer is a short pants that has elastic band at the waist and leg opening and usually it's around the knee area. It'll compliment the tops that she has.
It's really easy if you are comfortable with sewing with thin strip of elastic bands. Ready to try?
Measurement
For a tall 18 month toddler
Waist = 16" (included diaper allowance)
Length from waist to crotch = 10"
Width of leg opening = 12"
Materials
Light cotton fabric
0.25" width elastic for waist area (16" long)
0.25" width elastic for leg area (2 pc of 10" each)
Cutting Instruction
1. Fold the fabric Right Side Together and cut out 2 folded rectangle of 9" X 12.75". [note, when you open out the rectangle, it should fully measure 18" X 12.75"].
2. Then cut off a triangle at the bottom corner of the fabric that is 2" by 2" to make the crotch. Do the same for the other piece.
Sewing Instruction
1. Sew the crotch area together, Right Side Facing, starting from the middle and down to the bottom, using 3/8" seam allowance. Do the same for the other piece.
2. Serge the crotch seams individually as well as the leg holes. Press open the seams.
3. Fold up 0.25"of the leg hole and press. Sew close to the edge.
4. Pin the 10" elastic band round the leg hole starting from the inseam area, about 0.5" away from the edge of the hem.
5. Turn one piece Right Side In and the other Right Side Out. Put the Right Side Out piece into the Right Side In piece, align seams. That means, Right Side of both pieces face each other.
6. Pin and sew the inseams together. Turn it Right Side out and you have your bloomer!
7. For the elastic band waist, serge the waist band and fold in 0.5". Press and sew a straight stitch around the waist near the edge, leaving 1" gap for inserting of elastic band.
8. Overlap 0.5"of the band and do a zig zag stitch to close the elastic band.
9. Push the band back in to the waist band and pull it taut. Sew the gap close and you have your bloomer!
By the way, I sew her a pants too. But, it didn't fit my girl so I gave it to my friend's baby boy. It's a bit long but size should fit eventually. The fabric is from Spotlight. Looks so cute for a boy don't you think?
Friday, July 15, 2011
Kid's Pajama Pants
Recently I notice that the pajama pants are getting shorter on my daugther. Or rather, my girl has grown up so fast that her pant is like 3/4 pant handling just below her knee. I felt so sorry and bad that I didn't realised that she needed new pajama pants. Her top still fits so I thought I could make her a quick pants.
And I got just the right fabric for making one. : ) It's Michael Miller Sihouette Kids Double Border fabric that I got on sale from Fabric.com. The sihouette of girls playing on the bottom of the panel makes it just nice as the pant's bottom print!
Measurement
I couldn't take her measurement as she was in school so I took her shortie pajama pants and extend the length. She is a tall 6 year old. You can do the same as me or just take my measurement.
Length = 26" long.
Waist = 23" [I make it real comfortable and gave her a bigger ease at the waist of +1"]
Width of leg hole = 6.5"each.
Seam allowance 3/8"
Material
1.5 yard of cotton fabric [with interesting print at leg area will be fun!]
24" elastic band of 0.5" wide
Cutting Instruction
You can refer to the internet for various free pattern or just trace an old pair of pants like me. After you have the pattern pieces, place them on the fabric at fold so that you have 2 pieces. Or you can cut out 2 front and 2 back pieces based on Dana's pants tutorial.
Just note that when you are cutting print with lines or checked, you need to make sure that both sides are the same level/height on both leg pieces. So, you can cut the fabric with right side facing up for ease of comparison.
Sewing Instruction
For this pant, I've serged the crotch area (under the pants bottom) for both pieces first or you can sew first and then serge. It's up to you.
1. Fold each of the leg piece together, right side facing. Align side seams and pin the inseam under the crotch area together.
Start sewing from near the crotch and all the way down to the hem.
Iron seam open and serge the seam separately. Do the same for the other piece.
2. Turn one of the piece Right Side Out and leave the other Wrong Side Out.
Insert the Right Side Out piece into the Wrong Side Out piece, align inseam and crotch.
Pin in place around the crotch area.
3. Sew the crotch area together with the 2 pieces right side facing. If you have not serged/zig zaged the seam earlier, you can serge or do zig-zag stitches now.
Sew around the waist band near the serged edge, leaving a 2" opening for inserting of elastic band. Pin 2 pins to help you identify the start and end of your stitches. You can insert the label if you want at the back of the waistband. I didn't insert as it may be too scratchy for my girl.
5. Pin a safety pin through one end of the elastic band and insert through the opening. Take care not to let the other end goes in as well. Making sure that the band is not twisted, overlapped by 0.5" and sew a zig zag stitch to close the band.
6. Pull the waist band back into the waistband and straighten with both hands, and sew the opening close with straight stitch.
7. Next, to hem the pants. I've used the selvage of the fabric on the hem so I didn't need to serge the hem. Fold in 0.25" and press.
Sew all around the leg holes. Here, I insert the label infront of the leg.
Your new pants! Love the panel print at the leg area : )
And I got just the right fabric for making one. : ) It's Michael Miller Sihouette Kids Double Border fabric that I got on sale from Fabric.com. The sihouette of girls playing on the bottom of the panel makes it just nice as the pant's bottom print!
Measurement
I couldn't take her measurement as she was in school so I took her shortie pajama pants and extend the length. She is a tall 6 year old. You can do the same as me or just take my measurement.
Length = 26" long.
Waist = 23" [I make it real comfortable and gave her a bigger ease at the waist of +1"]
Width of leg hole = 6.5"each.
Seam allowance 3/8"
Material
1.5 yard of cotton fabric [with interesting print at leg area will be fun!]
24" elastic band of 0.5" wide
Cutting Instruction
You can refer to the internet for various free pattern or just trace an old pair of pants like me. After you have the pattern pieces, place them on the fabric at fold so that you have 2 pieces. Or you can cut out 2 front and 2 back pieces based on Dana's pants tutorial.
Just note that when you are cutting print with lines or checked, you need to make sure that both sides are the same level/height on both leg pieces. So, you can cut the fabric with right side facing up for ease of comparison.
Sewing Instruction
For this pant, I've serged the crotch area (under the pants bottom) for both pieces first or you can sew first and then serge. It's up to you.
1. Fold each of the leg piece together, right side facing. Align side seams and pin the inseam under the crotch area together.
Start sewing from near the crotch and all the way down to the hem.
Iron seam open and serge the seam separately. Do the same for the other piece.
2. Turn one of the piece Right Side Out and leave the other Wrong Side Out.
Insert the Right Side Out piece into the Wrong Side Out piece, align inseam and crotch.
Pin in place around the crotch area.
3. Sew the crotch area together with the 2 pieces right side facing. If you have not serged/zig zaged the seam earlier, you can serge or do zig-zag stitches now.
Turn the legs out and you can see a glimpse of the new pants.
4. To make the waist band, fold in 1" to the Wrong Side of pants and press. Serge/zig zag the waist edges.
Sew around the waist band near the serged edge, leaving a 2" opening for inserting of elastic band. Pin 2 pins to help you identify the start and end of your stitches. You can insert the label if you want at the back of the waistband. I didn't insert as it may be too scratchy for my girl.
5. Pin a safety pin through one end of the elastic band and insert through the opening. Take care not to let the other end goes in as well. Making sure that the band is not twisted, overlapped by 0.5" and sew a zig zag stitch to close the band.
6. Pull the waist band back into the waistband and straighten with both hands, and sew the opening close with straight stitch.
7. Next, to hem the pants. I've used the selvage of the fabric on the hem so I didn't need to serge the hem. Fold in 0.25" and press.
Sew all around the leg holes. Here, I insert the label infront of the leg.
| I've sewn double lines |
| Label at front leg to help her identify the front of the pants! |
Your new pants! Love the panel print at the leg area : )
| back view |
Subscribe to:
Posts (Atom)