Wednesday, June 29, 2011

A Big Tote Bag

I made this for my sister.


It's a super large tote bag for her to put my newphew's 4 days supply of clothes that he bring to his caregiver house after school. Hence, the need for a BIG bag to put in all the clothes.

The whole bag measure 14" X 14" X 10".

Cutting Instruction
A: cut 1 piece of outer fabric and lining measure 38" X 14"
B: cut 2 pieces of outer fabric and lining measure 14" X 10"
Some bias tapes of contrasting colours
2 nylon straps for the handle length 20"
1 discarded plastic placemat

Sewing Instruction
1. Iron on medium weight interfacing on the lining pieces for A and B pieces. Then pin fabric A piece to lining A piece with wrong side facing each other. Sew or serger around the the 4 sides. Do the same for the fabric B and lining B pieces.

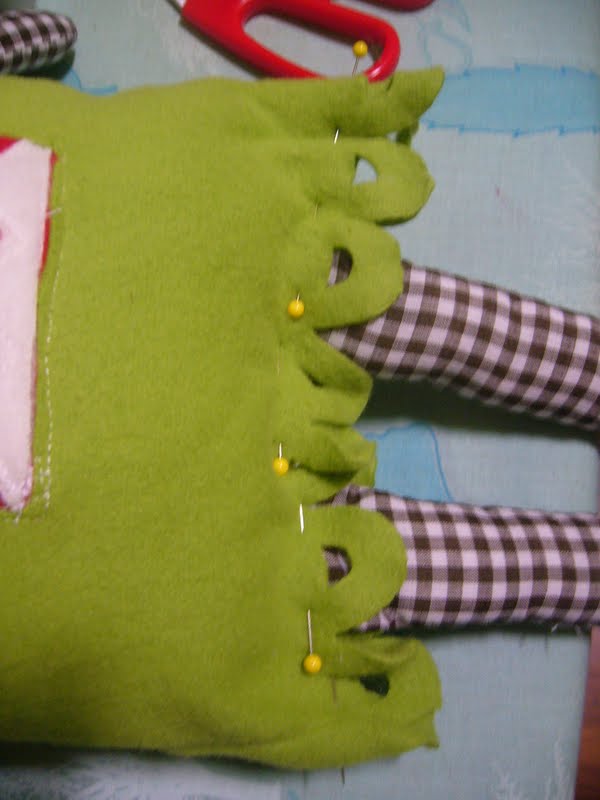
2. Place fabric A with right side facing down and place fabric B with right side facing up on top, aligning one of the long side and short side to the sides of Fabric A. Pin along the long edge.  See below for better illustration.

3. Now the tricky part. Fold fabric A so that the short side of fabric B (on top) is aligned to the side seam of fabric A. Basically, you are making a 90 degree turn and another 90 degree turn and continue till you reach the end of the other long side.  The longer side of fabric A should fit nicely to the 3 sides of fabric B leaving one of the short side unpin. You still with me?

4. Next, sew with 3/8" seam allowance around the 3 pinned sides. Start sewing from the top and when you reach the corner, with the needle still in the fabric, left up the presser foot and turn the fabric 90 degree around. Then, put down the presser foot and continue to sew. Do the same for the other corner. Finish off at the top of the other edge.  Don't worry about the raw edge as it will be enclosed in our bias tapes. Do the same for the other fabric B by placing it on the other side of fabric A. You will now have your boxy bag already.

5. For the base, to give it more body, I've used an unused plastic placemat and cut to the size 14" X 10". For a nicer feel, I've cut fabric A and sew a cover to insert the base in.

6. To enclose the raw side edges, sew bias tapes around them starting from the top, round the 2 corners and all the way back to the top. Remember to keep your needle in when you turn the fabric around at the corners.  Do the same for the other side.

7. Next, fold in the top edge by 3/8" and sew with straight stitch all around the top edge.


8. Measure 2" from the top left corner and pin one end of the strap down (see below). 

9. First, sew a straight stitch around to attach the strap. Then, flip up the strap and sew a box stitch over the overlapped area.  Measure 2" to the top right corner again and pin the other end of the same strap, make sure that the strap is not twisted. Do the same box stitch.

10. There, here is your super big bag!


Tuesday, June 21, 2011

Monster Inc

I made any soft toy but it's not a doll.  It's a green Monster for my nephew.  I felt sorry that he was not included in my gifts of dolls since he is a boy. But he asked for a monster instead so I decided to sew him one.


Since it's a monster, I just go with anything in my mind. I had in mind a green rectangle monster with red mouth and white teeth.  The final monster looks cute with the checked hands and feet. You would recognise those as the scrap left over from my husband's shirt!

It's really easy and you can try them too.  I've used fleece but you can just use regular cotton fabric if you want. 

Cut Pieces
Green body (2 pieces) measure 8"X 11"
Red patch for mouth (1 piece) measure 3.5"X 2"
White patch for teeth (1 piece) measure 3.5"X 2"
Square patch for eyes (2 pieces) measure 1.5"X 1.5"
Black scrap for eye balls
Fabric for legs (4 pieces) measure 7"X 2"
Fabric for hands (4 pieces) measure 4.5"X 2

Instruction
1. To sew the eyeball to the eyes, place the black strap ontop of the white square and sew a circle/square right on top of the black scrap.

2. Trim away the excess fabric around the sewn area and you have your eyes! Do the same for the other piece.


3. Place the eyes on the monster body and pin in place. Sew the eyes onto the body. Since it's a monster, I go for a square eyes. Trim away the excess and put aside.


4. For the mouth, place the white piece ontop of the red piece and pin in middle. Sew a zig zag line on the top and bottom part of the pieces.


5. After you have sewn the 2 zig zag lines, cut through the white piece in the middle. Be careful not to cut through the red piece!


6. From the cut middle line, you can cut away the excess white fabric close to the sewn zig zag lines.  You will now see your mouth. Does it looks scary??


7. Take your main body piece and draw an outline of a rectangle measure 3"X 1"and 6/8".  Cut out the space. This is to sew your mouth piece in.

8. Place your mouth piece behind the face and sew around the rectagle. Make sure that you sew the piece securly in place.

9. Pin 2 pieces of the legs together with right side facing in and sew around the edges, leaving the top edge unsew. Do the same for the other leg piece and the 4 hand pieces.

10. Turn them right side out and stuff with fibre fillings. Sew edge shut.


11. Pin and sew the leg pieces to the bottom of the body (wrong side facing up). This will be enclose inside the body later when you place both body pieces together. I've used this method as I want to keep the pattern at the bottom of the body piece in tact.

12. Turn the body piece over so that right side face up. Pin the hands so that the pieces are inside the body.

13. Place the face body piece onto of it so that the right side face inside. Sew around the circumference of the body pieces starting from bottom left. Leave the bottom edge unsew.

14. Turn the body pieces from the bottom.
It looks like a puppet now : )
15. Stuff the body with the fibre filling and sew the ends shut. You have your monster now. 


Hmmm...this monster reminds me of Dora's the explorer's bagpack! Hahaha...

Sunday, June 19, 2011

A new shirt for Father's Day

Phew! I've finally finished it.

A new shirt for my husband. I've used the Simplicity 4760 pattern for this shirt.  This was my first attempt and I felt really happy to be able to sew it.  I would say it is relatively easy except for the collar part which needs some in dept reading of the instruction. But overall, a project for intermediate sewer like me.

Let me share some of my thoughts after I sew the shirt.  Well, I love the loop at the collar. The yoke at the shoulder area is very nice too.  It was suppose to have 2 pockets but...(You read about it below).

I chose the wrong fabric to start with. Since it was my first, I should have stick with a plain one-coloured fabric instead of the checked cotton : ( Hence, the mis-aligned pockets. It was suppose to have 2 pockets but because my shirt was misaligned and it shows real bad with the checked print, I took out one. My husband had no problem with that since he finds 2 pockets abit perculiar anyway.

When I took my husband's measurement, it was an 'L' according to the reading but the final shirt came out to be a tad too big. Hmm. I'll downgrade it to M for the next shirt then.

I would say the collar would look nicer with a collar band. The pattern didn't include one so I'll try to do one the next time.

My husband was quite pleased with his new shirt. Ï"m game to do another one soon. In the meantime,

Happy Father's Day!!

Tuesday, June 14, 2011

Scarf to Skirt

I'm in the midst of completing my Father's Day surprise for my husband and didn't have time to do any serious sewing for the past week. On top of the busy schedule, I fell sick and didn't get any sewing done. But I managed to finish a refashion project!

This was the BEFORE photo - a Red scarf

And AFTER - a kid sized skirt!

I've used the fold over elastic for this project and it really save time of having to sew the waist band and inserting the elastic. I bought some of these fold over elastic (which is use to sew the waistband of ladies panties) from the Textile centre. They have limited colour range and sizes but I'm glad I bought some.

I've used zig zag stitch on my machine to sew them over the raw edge. It's really simple so no tutorial here. Just cut the scarf into half and sew the side seams together. The good thing is the hem are already hemmed! Just encase the raw edge on top with the fold over elastic and you are done!

close up on the fold over elastic
 This will fit my 1 year old girl perfectly. Go try some refashion project if you haven't. I promise you that it'll be very addictive and fun, plus its super quick too!

Tuesday, June 7, 2011

Doll, doll and more dolls!

Remember the black apple doll that I made earlier for my girls? She wanted more. Much more. To be exact, 26 dolls in total! She had in mind to name them each after an alphabet. I've already made 3 earlier and their names are: Apple, Belle and Crystal!

meet Apple, Belle and Crystal!
I made her another one.
A bigger version with plaits and tights!
This one is much bigger than the previous ones and I added the plaits. So sweet. On hindsight, I shouldn't have use knit for the body cause it stretch and my dolly seems to have a big bum! Added the ruffle at waist for more variation. She looks this one.

So, I made another one for her little sister.

ponytail sweet little thing
It has a cute fringe and pony tails. A little polka dots ruffle infront added the sweetness.


Guess what, I made yet another bigger one. Talk about obsession!

The little sister loved them! She woke up the next day and hug all of them!


Did I stop there? NO! I made just one more for my little niece : ) Well, a girl can't have too much dolls right? I'm now getting so good at this one that it all done in 1 hour time! beam beam!
Thought I"ll add a detachable tutu for this one!

Sunday, June 5, 2011

Floral dress for me

This was suppose to be a shift dress but I thought it would look better with the waistline added using the ribbon. I look kinda fat with that ribbon to break the line : P

The blue trimming around the neckline and hem is actually bias tapes! I got many from my last shopping at Textile centre at 80cents each. It really draws out the dress don't you think?

Thursday, June 2, 2011

It was my birthday

Sorry, for the late post cause I'm out of action to rest and relax. It was my birthday the other day and I had a great day.

Birthday has always been a special day for me. Not that I've grand celebration every year, but, it always reminds me of the pain my mother went through to gave birth to me. Especially since I'm now a mother of 2, I really want to appreciate her on this special day for her hard work. I know it may seems weird to some of you but I just feel that I should start the day with my mum before I do anything with my husband. It's not like our mothers will be with us forever. We must always value and spend time with people that we loved when there is time.

So, like a tradition that I've started with my mum a few years back, I went back home for the traditional mee sua (chinese vermicilli that we eat during our birthday) with hard boiled egg and shredded chicken. It was a peaceful time of breakfast with my parent and my husband of course. I told her I loved her and thank her for all the things she had done for me : ) Felt at peace and went off with a date with my husband which is so rare nowadays with the baby around.

We had a buffet lunch at the Carousel at Royal Plaza Hotel. It was delicious and we enjoyed stuffing ourselves with the seafood and desserts. We made a promise to not talk about the kids but just on us. The US in the relationship has kinda got lukewarm with the 2 kids and daily routine of life. Thank God for a day out with him.

Will go back to my sewing soon. Had alot of projects in mind and can't wait to get them started. Lots of gifts my my niece and nephews and kids of my church friends. Come back soon to visit.