Monday, October 31, 2011

Reward Chart


This year I started a Reward chart for my older girl. Her childcare teacher suggested to me to have this chart at home to reward her good behavior as she seems to do better with this chart in school.

So, we had this chart where I award her points for good behaviors. Extra point given for doing the extra like doing things without being told or being praised by her teachers or helping her friends. I do deduct points at times for bad behaviors. Like when she misbehave in school and didn't do her homework.

If you asked me, it worked most of the time but deduction of points in straight row cause dissentments and uncooperation from her. So nowadays I'll pace myself and not deduct points in consecutive days.  I also give out interim rewards like movie trips or eating at her favourite japanese restaurants when she reached every 10's on the chart.

The final reward at the end of the 100 points is a brand new kids bicycle which is what she wanted. We are working together to achieve this goal before Christmas. At 72 points now, I guess we are moving close.

You can do a simple Reward chart using Word document and insert drawings using clipart of just different shapes.  Mine is given below. You can download and use it if you like.

So, how do you manage your kids? I will like to know as sometimes my patience is tried.


Pin It

Thursday, October 27, 2011

Dolls and such

Have you seen fabric with front and back of dolls or animals printed for easy sewing of dolls. It's so easy to sew up a doll from these fabric.


Just cut around the dotted lines and place them right side facing and sew all around, leaving a small gap for turning the doll over. Stuff them up and sew up the gap and you have your dolls.

I bought this fabric from a shop at Textile centre for $12.50. There are 4 dolls designs and come with 4 types of animals too.


And I sew them up into these...


4 cute dolls and their animal pets. So adorable and quick. If you want to make some, drop by Textile centre and get one of these pre-printed fabric to make some. I think they have another design too.

Pin It

Monday, October 24, 2011

A Super Long Pillow

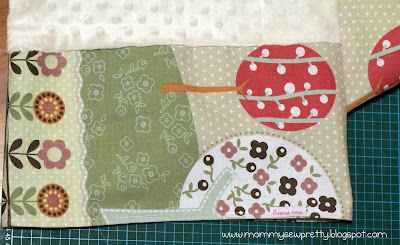
I made a super long pillow to put on my bed for my active toddler so that she'll not roll off the bed when she sleeps.  And I found the perfect fabric for it.

front with pillow inserted in
front cover only
The front of the pillow case is a cute fabric with Babushka dolls print from Spotlight. My bed frame is dark brown so the brown color scheme of the fabric will looks just right. This is from home furnishing section and selling at $12+ for one meter.

back view with minky backing

back cover only
The back of the pillow case is a cream coloured minky dot fabric from Spotlight on sale for $15+ per meter instead of $22. They are super soft and so nice to touch! I've mixed some of the front fabric with minky to make it more interesting.

I didn't follow any pattern as well as I thought it's quite easy and simple. The measurement is up to you as I use the length of my bed as a reference.  I'm putting a simple tutorial here in case you want to do one. I guess it will also work as a lounge pillow too!

The finished size is 50" X 15".

Material
Medium-heavy weight fabric [64" X 16"]
Minky Dot fabric [38" X 16"]
2 pc Lining fabric [51" X 16" each]

See below on the cutting size [not drawn to scale] - included 0.5" seam allowance
(Front)


 Main fabric
51” X 16"

(Back)


Front fabric
4.5” X 16”


Minky dot fabric
38” X 16”


Front fabric
8.5” X 16”


Instruction
1) To make the Back, pin the 2 side panels to the left and right side of the minky dot fabric (see diagram above) along the 16" side.  Make sure it is right side facing each other.  Align the edge and pin in place.


2) Sew with 0.5" seam allowance. Minky fabric is quite slippery so you need to make adjustment as you sew. Serge the seams if you like.

3) Put the front and back panel, Right Side facing each other and pin along the 2 long edges (51"). You need to sew them together later. 


4) Sew along the 2 long edges of the front and back to make a long tube. Press seam open.

5) To sew the lining, follow the same steps for 3 and 4.

6) Turn the pillow case Right Side out and insert it into the lining tube. Make sure that the Right Side face each other inside. Pin along one of the short edge. Try to align the seams.

7) Sew around the edge with 0.5" seam allowance. Then pull out the front fabric and you will see a super long tube.


8) Insert the lining back into the front fabric so that Wrong side face each other. Your raw seams are now hidden between the front and lining fabric! Press the fold line and top stitch along the edge so that it's neat.


9) To make the other end neat, fold 0.25" of the lining fabric towards the wrong side and press. Fold another 0.25" and press again.  Do the same for the front fabric.


10) Align the edge of the front and lining fabric and pin. Sew all around and your raw edge are now encased in between.

That's it. Insert your long pillow and you are done.

To make the pillow insert, cut a fabric measure 50" X 14.5" so that it's slightly smaller than the cover.  Sew along the long side and one short side. Turn it inside out and fill it with cotton or Hobby fibre.  I bought a 1kg pack from Spotlight at $16 after a 20% discount. After you've filled up, sew the ends shut and you are done.

pillow insert


Saturday, October 22, 2011

Artfolio bag

front

back

I made this for my girl as she is starting primary one next year and needed a bag to keep her art book. The cute fabric is a medium weight home decor fabric from Spotlight. I love how the front and back is slightly different in the position of the colored stripes.


It's roomy and colorful. The lining is some cotton fabric that I've on hand.


Had originally intend to put a pocket in there but in my haste, I've sew up the lining and bag. Oh well, it's still looks good.

Friday, October 21, 2011

A roundup of the KCWC Fall 2011

Okay, here's my kids in their new clothes that I made for them for KCWC Fall 2011!

Sunshine Dress
My pretty little lady

So you can see her butterfly button

I love how she looks up to her sister, so cute!


Knit Top
It's abit big on her but she loves the button
A line skirt
She wouldn't look into the camera so I can't get a still photo of her in the skirt.

I caught her when she was just about to sneeze!
Floral Top
 She can't stop pulling the buttons cause they are so cute!

 Ok, got to take a closer look at the delicious buttons!


Finally, a more proper shot of the blouse. Cut buttons right?

Skirt with pocket


Haven't got a chance to take photo of the vest and shorts yet. Probably this sunday when she wear them to church I can get some nice photos!

Wednesday, October 19, 2011

New blog look

How do you like the look of the blog now?

Have been trying to find a nice look for the blog and found some really nice one at Leelou Blogs.  If you are finding it strange that the background kept changing at every page, sorry..I'm in the midst of making up my mind which one looks best : P

Oh, had plan to upload the photos of my girls wearing the clothes I made for them during the KCWC but can't seem to get a good one. Will try again tonight and see if tomorrow is possible. Sigh..that's the limitation of a working mom.

Anyway, have been doing some other non-clothing sewing these few nights. Can't wait to share the tutorial soon. So, keep coming back ok?

I just can't bear to leave the blog without any photo! So here's one random one of my 2 girls playing.

Sunday, October 16, 2011

KCWC Day 7

The final day of the KCWC. It was indeed very fulfilling, but tiring as well. I was glad I had plan well and made my preparation work last week else I'll not be able to complete all my projects.

The last KCWC, I've made a shorts for my girl. It has pocket with flaps and buttons and elastic waistband.

front view

back view

close up on the pocket flap
I especially like the pockets with the flap and shiny buttons.  It was made using the leftover suiting fabric from my top.  So I didn't have enough fabric and I skipped the additional hem details and used another cotton fabric at the inner waistband to make up for it. Anyway, it still looks good. : )

I followed the pattern from this Japanese book (as you can see, it is my favorite for kids clothes).


This pattern specifically...

I'll try to take photos of my kids wearing the 7 clothes in my next post, hopefully they will cooperate.  Really enjoyed the KCWC and glad that I join in the fun and challenge. I'm a better planned sewer now, I think : )

Saturday, October 15, 2011

KCWC Day 6

A sunshine dress

I've traced out one of her dress and make this one up myself. The neckline and armholes are binded with bias tapes.

The waistband is made of bias tape too. I made the small sweet ribbon and sew it on by hand.

This is the back view of the dress.  I sew a 4mm elastic band at the back waist area so that it will give the dress some form.  First time trying so my skills are so-so but I'm happy with this addition. Makes the dress interesting.

Did you notice the shoulder area. I've also sewn elastic band along the inside of the shoulder seam and make it narrower and much better fit.

I love the sweet pink butterfly button closure. It was a request by my girl. It really suit the dress like a butterfly in a garden of bright flowers, don't you think? And the best of all, the dress is fully lined! Cause the cotton fabric is quite light weight and I feel a lining will makes it more cooling and comfortable to wear.

I'm afraid I don't have a tutorial here since it evolves as I sew. It was suppose to be a simple dress but the bias tapes and elastic details make it more interesting, I think. I will definitely going to sew another one for my younger girl and even myself.  Maybe then I'll do a tutorial if anyone is interested to learn.

Gosh, tomorrow will be the last day of KCWC. I'm really beat but very much pleased of all my sewings. Not that they are perfectly made but I'm glad I've meet my objective to sew one garment a day for my girls.  How's your KCWC? I believe, challenging but rewarding right?

Next week, I think I will do some early Christmas sewing and probably some skirts/dress for me and some bags. See ya!

Friday, October 14, 2011

KCWC Day 5

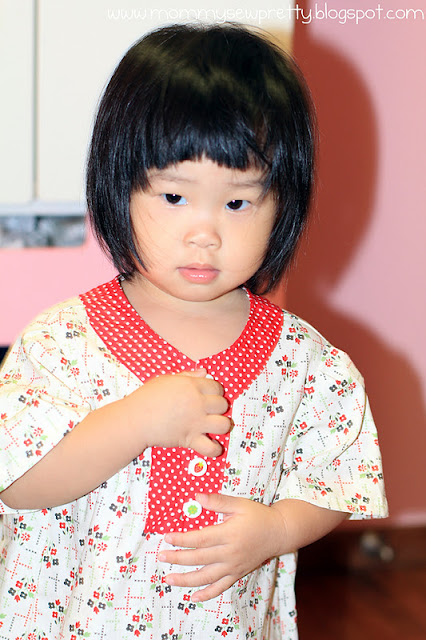
A floral blouse with cute button details.

front

back
I made this with the pattern from Pochee, a Japanese sewing magazine. This issue focus on kids sewing.


Look, this blouse is where I adapt the blouse. It's a design from Yuki Araki who did a lot of kids sewing pattern books.


Love the Red yoke details at neck area.  Did you notice the four cute buttons. Got them from Diaso for $2!


What did you sew for KCWC?