 |
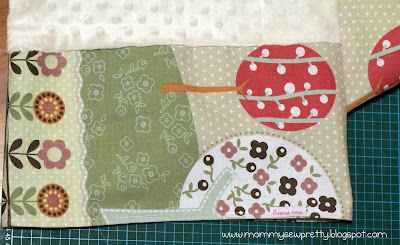
| front with pillow inserted in |
 |
| front cover only |
 |
| back view with minky backing |
 |
| back cover only |
I didn't follow any pattern as well as I thought it's quite easy and simple. The measurement is up to you as I use the length of my bed as a reference. I'm putting a simple tutorial here in case you want to do one. I guess it will also work as a lounge pillow too!
The finished size is 50" X 15".
Material
Medium-heavy weight fabric [64" X 16"]
Minky Dot fabric [38" X 16"]
2 pc Lining fabric [51" X 16" each]
See below on the cutting size [not drawn to scale] - included 0.5" seam allowance
(Front) Main fabric 51” X 16" |
(Back) Front fabric 4.5” X 16” | Minky dot fabric 38” X 16” | Front fabric 8.5” X 16” |
Instruction
1) To make the Back, pin the 2 side panels to the left and right side of the minky dot fabric (see diagram above) along the 16" side. Make sure it is right side facing each other. Align the edge and pin in place.
2) Sew with 0.5" seam allowance. Minky fabric is quite slippery so you need to make adjustment as you sew. Serge the seams if you like.
3) Put the front and back panel, Right Side facing each other and pin along the 2 long edges (51"). You need to sew them together later.
4) Sew along the 2 long edges of the front and back to make a long tube. Press seam open.
5) To sew the lining, follow the same steps for 3 and 4.
6) Turn the pillow case Right Side out and insert it into the lining tube. Make sure that the Right Side face each other inside. Pin along one of the short edge. Try to align the seams.
7) Sew around the edge with 0.5" seam allowance. Then pull out the front fabric and you will see a super long tube.
8) Insert the lining back into the front fabric so that Wrong side face each other. Your raw seams are now hidden between the front and lining fabric! Press the fold line and top stitch along the edge so that it's neat.
9) To make the other end neat, fold 0.25" of the lining fabric towards the wrong side and press. Fold another 0.25" and press again. Do the same for the front fabric.
10) Align the edge of the front and lining fabric and pin. Sew all around and your raw edge are now encased in between.
That's it. Insert your long pillow and you are done.
To make the pillow insert, cut a fabric measure 50" X 14.5" so that it's slightly smaller than the cover. Sew along the long side and one short side. Turn it inside out and fill it with cotton or Hobby fibre. I bought a 1kg pack from Spotlight at $16 after a 20% discount. After you've filled up, sew the ends shut and you are done.
To make the pillow insert, cut a fabric measure 50" X 14.5" so that it's slightly smaller than the cover. Sew along the long side and one short side. Turn it inside out and fill it with cotton or Hobby fibre. I bought a 1kg pack from Spotlight at $16 after a 20% discount. After you've filled up, sew the ends shut and you are done.
 |
| pillow insert |


2 comments:
Where did you buy your minky fabric from
Oh, I brought it from Spotlight at Plaza Singapura. They have a sale now on and you can get it at 50% off. It's still kinda expensive but I feel that it's worth it because minky is so so soft!
Post a Comment