Material
1 pillowcase
3 strips of jelly roll (measuring 2.5" X 42" each)
matching thread
button for decoration
Instruction
Cutting
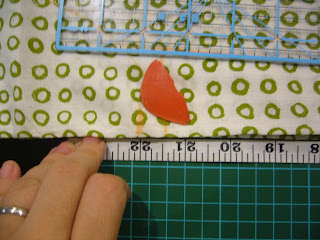
First fold the pillowcase lengthwise into half with the open side place the the bottom. Cut a J shaped from the top left hand side (open side) opposite of the folded side. The measurement from the tip end of J to the bottom of the pillowcase is the total length of your girl's measurement from her armpit to her knee (depends where you want her dress to end). For my girl, her measurement was 22". So, I measure 22" from bottom of pillowase and make a mark.
Then I use a curve ruler and make the J shape. The top of the J will extend about 4" into the pillowcase.
Then, at the end of the J, measure 2" inwards and draw a diagonal line from the 2" to the bottom edge of the pillowcase. This will give the dress some shape, else the dress will look too boxy.
Cut off the J shape and the diagonal triangle at the side. You can also trim off about 4" from the top of the pillowcase as I will be adding the neckline later. See below.
Side seam
Open up the pillowcase and turn it inside out. Pin the 2 sides together and sew them from arm hole to hem. I've use the zig zag stitch to sew the edges to prevent fraying.
Hem
Take 1 jelly roll (measuring 2.5" by 42") and sew a 0.5" seam. Pin the other unsew edge (right side facing each other) to the hem of the dress. Sew the raw edge to the hem of your pillowcase dress. Press open seam. You now have a new hem to your dress. You should have some extra left over after you have done sewing the hem. Keep this aside as later we can use this to make a decorative ribbon.
Arm holes
Next, fold in 0.25" of the arm hole area and press. Fold another 0.25" and press. Sew a seam around it. Do it for the other arm hole.
Neckline
Fold in 0.25" of the neckline and press. Sew the biggest stitch (gather stitch) along the neckline at and leave a long thread at end of the sewing. You will then use this thread to pull and gather the neckline. Do it for the other neckline.
Put 2 strips of jelly roll right side facing each other and sew the side edges and 1 side of the long edge. Turn over and press.
Now is the tricky part. Read the instruction carefully. Measure the middle of the strip and place a pin to mark the spot.
Then, fold in 0.25" on the unsew side of the strip and press. Place the strip with the open side facing the gathered neckline you have sewn earlier. Put the open side of the strip to cover the gathered stitch of the neckline as shown below. Pin them in place for both front and back necklines.
When you position the strip, make sure that you have about 2.5" from centre of the strip to the start of your neckline (see blue line below). After you have done with the 2 necklines, you should have about 13" left on both ends which you will use a bow later. Make sure that the both ends are equal in length.
Sew the strip to the neckline starting from the short side. Sew all the four sides, be sure to sew in the gathered neckline.
Flower ribbon
Remember the extra strip left over from your hem? Well, sew a big gather stitch in the middle of the strip and pull the thread so that the strip gather nicely. Either use a glue gun or stitch the ends together.
Put a white button on the bottom of the half-moon flower to hide the gather and sew them to the new neckline.
There! Now you have a beautiful pillowcase dress. If you find sewing this neckline stressful, you can also try the other version to sew a loop over the neckline and thread your ribbon through it to make a big bow. Let me know if you have try the above and I would love to see your versions!


5 comments:
I just love the pillowcase dress in the green and the way you did the neckline is beautiful. I just started making these dresses using tutorials that I googled. Now I see that there is no limit to the creativity with these simple but adorable little dresses. Thank you. Theresa
Can't wait to try this variation. The neckline is adorable and a bit more professional looking than what I've been doing.
I love that your version makes the pillow case dress more sophisticated, but it looks so simple to sew. I can't wait to try it.
I just made 2 of these dresses in sizes 2 and 4. They came out beautiful! Thank you for posting this. I have a question, if I made bigger sizes, would all the measurements be the same when putting in the neckline/sash? Thank you again for the tutorial.
Cecilia Goins
gcecilia60@yahoo.com
Hi Cecilia
Happy you attempted the pillowcase dress. The sash can be longer but if you use the same measurement, it will be still okay, maybe shorter since your neckline will be bigger to accommodate a bigger size girl. : )
Post a Comment